Moscato Mom

  • Home
  • All Recipes
  • Keto Recipes
  • Fitness
  • About
    • Work With Me
    • PR Friendly
  • Privacy
  • Home
  • All Recipes
  • Keto Recipes
  • Fitness
  • About
    • Work With Me
    • PR Friendly
  • Privacy

Whole30 Halloween Stuffed Bell Peppers

By 9 Comments

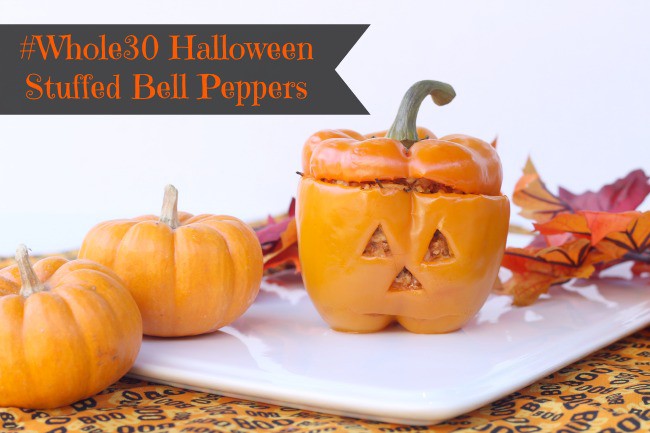
With Halloween just around the corner, I had an idea of a "treat" everyone would enjoy that would still keep us in line with our health goals. Halloween Stuffed Bell Peppers are perfect! 

A traditional stuffed bell pepper recipe is made with rice - which is full of carbs! I wanted to clean things up so I made a few tweaks and I have to say - these have even more flavor! 

Wanting to make it fun for the kids too, I made a couple little cuts... and the result was adorable. 
How To Reheat Stuffed Bell Peppers

Stuffed bell peppers are a great dish to make ahead of time - because they reheat so easily!

To reheat, simply place in a shallow baking dish with a bit of water at the bottom. 

Loosen stuffing a bit and place in a preheated oven for about 10 minutes! Voila! 

Whole30 Stuffed Bell Peppers

Ingredients

  • 1 pound ground turkey breast
  • 1 large head of cauliflower , cut into pieces
  • 4 large orange bell peppers
  • 1 can whole30 complaint tomato sauce
  • 1 large yellow onion , minced
  • 1 large green bell pepper , minced
  • 2 teaspoons minced garlic
  • ¼ cup chicken broth
  • 2 tablespoons parsley
  • 2 tablespoons basil
  • 1 tablespoon garlic salt
  • 4 tablespoons olive oil

How To Make Stuffed Bell Peppers

  1. The first step is to turn your cauliflower into “rice.” Grate pieces of raw cauliflower in a food processor.
  2. In a skillet, heat olive oil and garlic salt. Add in cauliflower “rice” and cook 5-7 minutes, stirring often to prevent sticking.
  3. Cauliflower will be soft and begin to brown. Turn off the heat and set aside. Turn your oven on to preheat 350*.
  4. In another skillet, brown your turkey completely until all pink is gone. Add in minced onion, minced green bell pepper, minced garlic, parsley, and basil.
  5. Add in chicken broth and let cook down – about 7-10 minutes.
  6. Add in tomato sauce and cauliflower “rice” and let simmer until most of the liquid is gone, stirring often.
  7. While the meat mixture cooks down, cut the tops off of the four orange bell peppers and gently remove the seeds from the inside. With a small paring knife, carefully cut out the eyes, nose, and mouth of the jack-o-lantern.
  8. Fill each bell pepper with the meat mixture and replace the top.
  9. Gently place into the corner of a deep pyrex dish with the jack-o-lantern facing out.
  10. Make sure they are standing upright and gently place on the middle rack of the oven. Bake for 20 minutes or until bell pepper is softening.
  11. Let cool and serve with your favorite sides. Enjoy!

When the family came to the dinner table they all loved their little individual "jack-o-lanterns" and gobbled up every bite.

It wasn't until after they finished that I told them they were 100% Whole30 Compliant. How's that for a "trick!?"
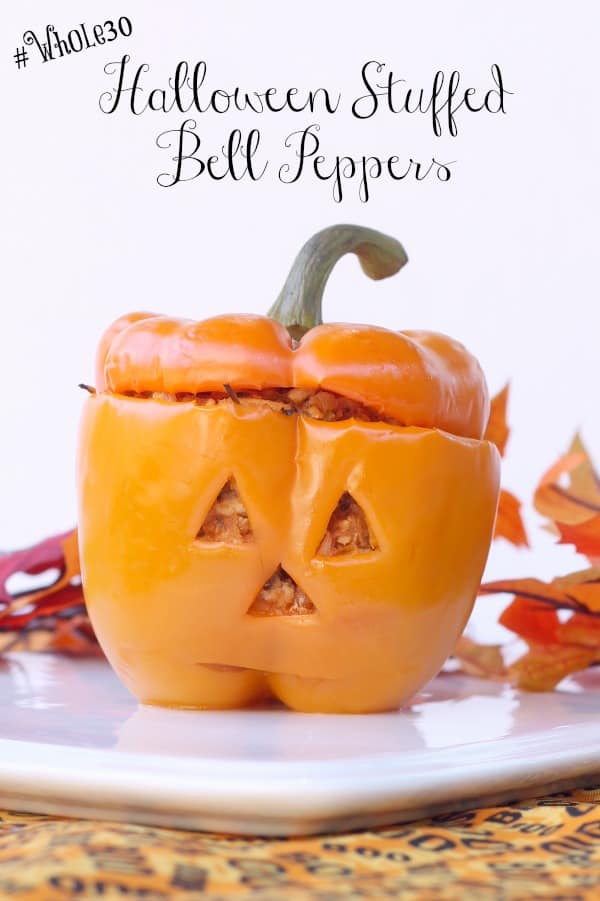
whole30 stuffed bell pepper recipe
Yield: 12

Whole30 Halloween Stuffed Bell Peppers

Whole30 Halloween Stuffed Bell Peppers

These festive Whole30 Stuffed Bell Peppers are low in carbs and big on taste! Suer fun for Halloween!

Prep Time 20 minutes
Cook Time 20 minutes
Total Time 40 minutes

Ingredients

  • 1 pound ground turkey breast
  • 1 medium head of cauliflower
  • 12 bell peppers
  • 1 can tomato sauce
  • 1 large yellow onion
  • 1 large green bell pepper
  • 2 teaspoons minced garlic
  • ¼ cup chicken broth
  • 2 tablespoons parsley
  • 2 tablespoons basil
  • 1 tablespoon garlic salt
  • 4 tablespoons olive oil

Instructions

  1. The first step is to turn your cauliflower into “rice.” Grate pieces of raw cauliflower in a food processor.
  2. In a skillet, heat olive oil and garlic salt. Add in cauliflower “rice” and cook 5-7 minutes, stirring often to prevent sticking.
  3. Cauliflower will be soft and begin to brown. Turn off the heat and set aside. Turn your oven on to preheat 350*.
  4. In another skillet, brown your turkey completely until all pink is gone. Add in minced onion, minced green bell pepper, minced garlic, parsley, and basil.
  5. Add in chicken broth and let cook down – about 7-10 minutes.
  6. Add in tomato sauce and cauliflower “rice” and let simmer until most of the liquid is gone, stirring often.
  7. While the meat mixture cooks down, cut the tops off of the four orange bell peppers and gently remove the seeds from the inside. With a small paring knife, carefully cut out the eyes, nose, and mouth of the jack-o-lantern.
  8. Fill each bell pepper with the meat mixture and replace the top.
  9. Gently place into the corner of a deep pyrex dish with the jack-o-lantern facing out.
  10. Make sure they are standing upright and gently place on the middle rack of the oven. Bake for 20 minutes or until bell pepper is softening.
  11. Let cool and serve with your favorite sides. Enjoy!

Nutrition Information:

Yield:

12

Serving Size:

1

Amount Per Serving: Calories: 159Total Fat: 6gSaturated Fat: 1gTrans Fat: 0gUnsaturated Fat: 5gCholesterol: 27mgSodium: 643mgCarbohydrates: 11gNet Carbohydrates: 8gFiber: 3gSugar: 6gProtein: 15g

Nutrition calculations based on exact ingredients used and may vary between brands. For exact macro measurements, always calculate your own macros using the exact ingredients that you use.
Did you make this recipe?

I would love to see! Tag me on Instagram @lynsey.kmetz or use the buttons below to share it on Pinterest! Thanks for your support!

© Moscato Mom
Cuisine: American / Category: Main Dishes

Chia Seed Pudding from Family Fun Magazine

By 1 Comment

chia seed pudding

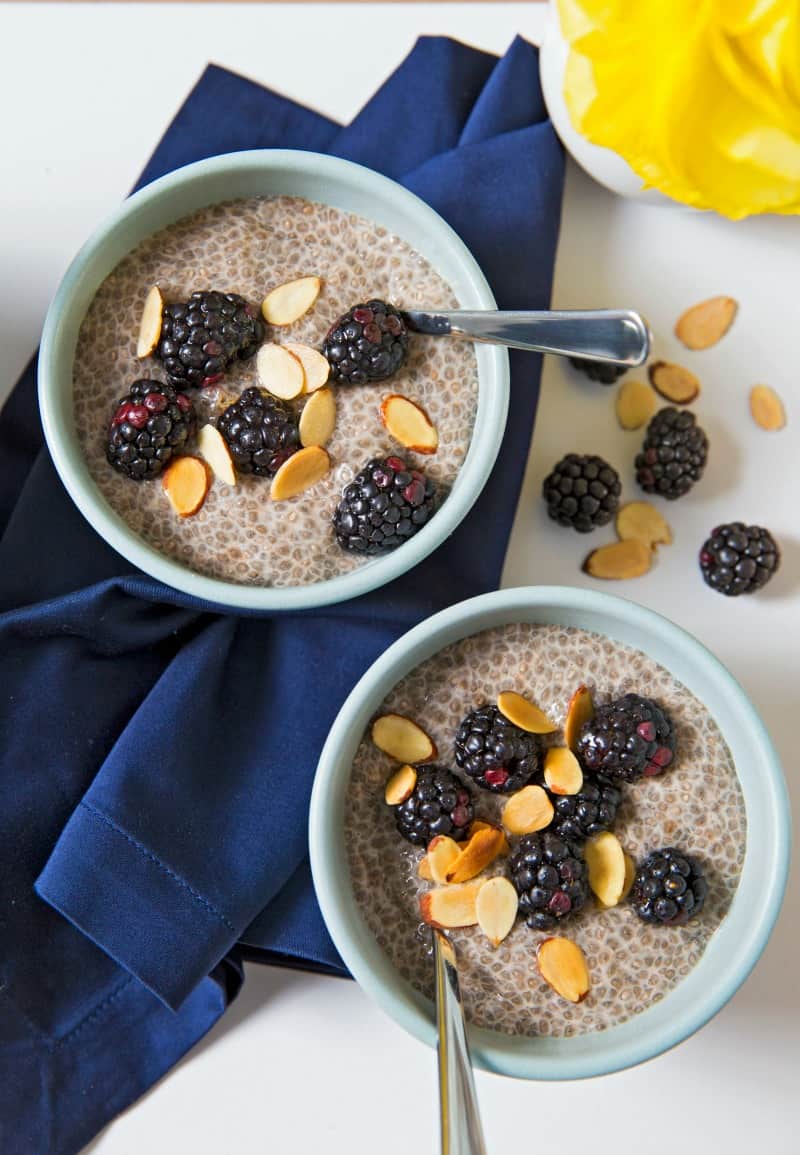
One meal I continuously struggle with is breakfast. Some days I wake up so hungry I could chew my pillow while others I forget to eat entirely until lunch time. Breakfast is the most important meal of the day, so I knew I needed to find something that I would like to eat - even when I am not feeling particularly "hungry." I was on the hunt for a make ahead breakfast and I found Family Fun Magazine's Chia Seed Pudding. Not only does it look delicious, but chia seeds among the healthiest foods on the planet. Chia Seeds offer a ton of nutrients with very few calories, and also pack an antioxidant punch! Since they are relatively tasteless you can mix them with just about anything - making them a simple, healthy change you can begin right away. I love the idea of Chia Seed Pudding that I can make ahead and I can even change it up be garnishing it with whatever fruit or berry I might be in the mood for that day.

chia seed pudding

Chia Seed Pudding

MAKES 4 SERVINGS

INGREDIENTS

  • 2 cups unsweetened almond milk
  • ¼ cup honey
  • ½ tsp. cinnamon
  • ½ tsp. vanilla extract
  • ½ cup chia seeds
  • 2 Tbs. sliced almonds, toasted
  • Fresh blackberries, for garnish
  1. Measure out and whisk together the almond milk, honey, cinnamon, and vanilla extract in a medium bowl until well combined. Add the chia seeds and set aside for 15 minutes.
  1. Whisk the almond milk mixture again to redistribute any chia seeds that may have settled, then divide the mixture among four 6-oz. ramekins or small jars. Cover and refrigerate overnight. Serve topped with toasted almonds and fresh blackberries.

This is a great grab-and-go option for breakfast too. Whether I am sitting on the couch watching GMA (my normal morning routine) or heading out the door early I can nosh on this quickly and feel great. It is very filling even for a small amount! Super happy about this find, so I just had to share! Between this and my Low Carb Breakfast "Muffins" I make sure I at least eat a little something for breakfast!

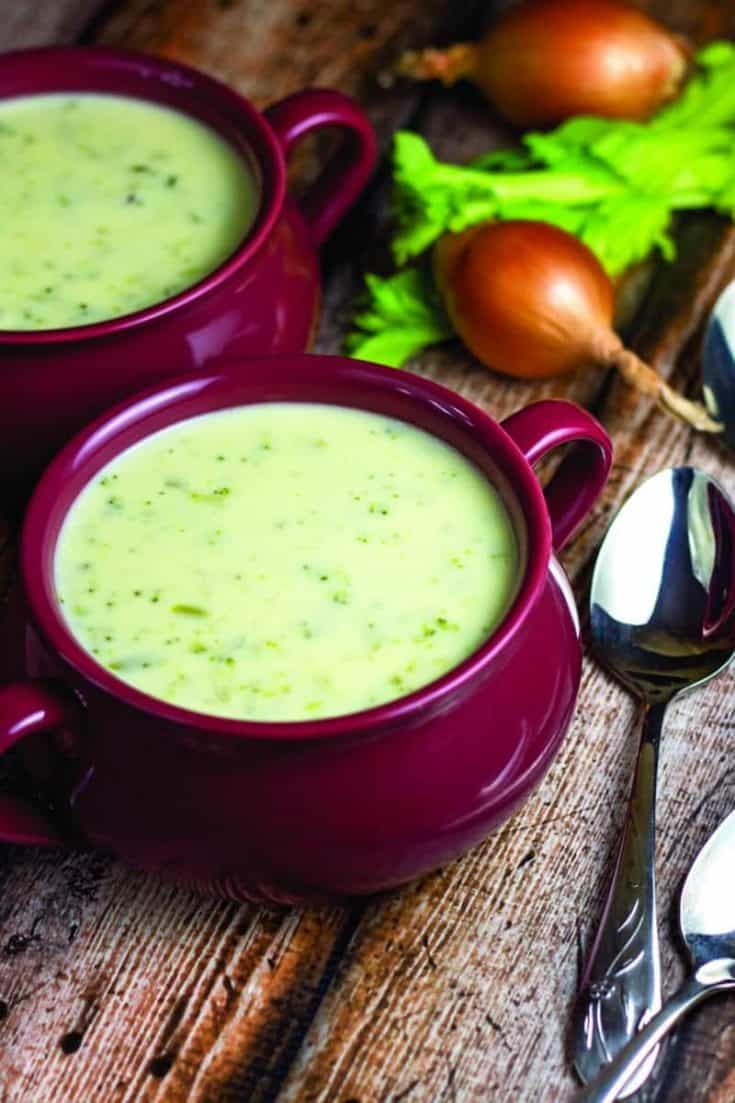
Cream of Broccoli Cheddar Soup Recipe

By 1 Comment

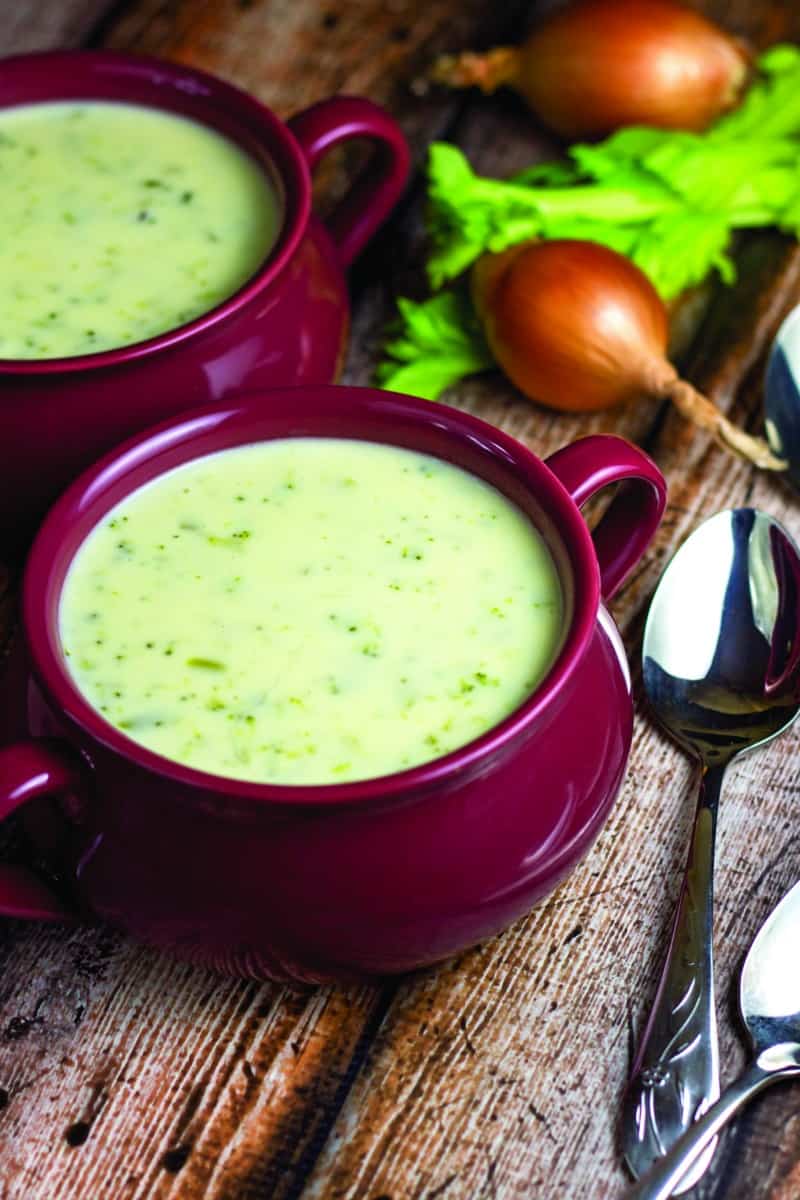
It seems like it is never going to stop raining here on the Gulf Coast. Even as I type this I can hear the rain coming down and the thunder in the distance. With weather like this, I know two things are for sure: I want to eat some comfort food - like Broccoli Cheddar Soup - and I do not want to have to go to the store to get it.

weather

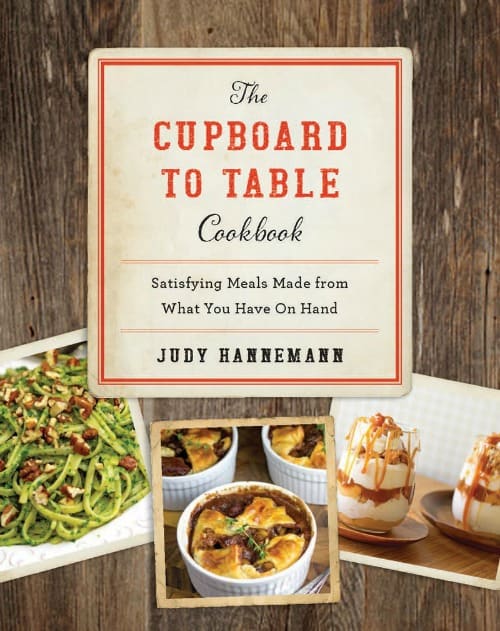
This loosely translates into that I have to get pretty creative with what I have on hand to make some kind of meal. Now, rain wasn't the reason why Judy Hannemann wrote her new cookbook, The Cupboard to Table Cookbook: Satisfying Meals Made From What You Have on Hand (on sale May 3) but the way we have been getting downpours around here every day, I think it certainly applies.

cupboard to table cookbook

The Cupboard to Table Cookbook: Satisfying Meals Made From What You Have on Hand is all about easy, crowd-pleasing recipes made with pantry, freezer, and fridge staples—so you’ll never need to run out mid-recipe or brave the grocery store crowds after work - or during a thunderstorm. Perfect for the busy mom, the frugal cook, or anyone who lives in a rainy rural area. Judy, the blogger behind the popular Bake at Midnight blog, is known for her ability to take simple ingredients and turn them into delicious, reliable recipes that work every single time.

I am excited to share one of the recipes from the book with you! I have not tried it - yet!! - but it sure does sound delicious. And I checked - these are all items I have on hand. If it is in MY very scarce kitchen, I am betting it is in yours too.

Yield: 8

Cream of Broccoli Cheddar Soup

Cream of Broccoli Cheddar Soup

Ingredients

  • 4 tablespoons unsalted butter
  • ¼ cup celery, finely chopped
  • ¼ cup onion, finely chopped
  • ¹?8 teaspoon thyme
  • 2 teaspoons salt
  • 1 teaspoon pepper
  • 2 chicken stock cubes
  • 1 package, (10-ounce) frozen chopped broccoli, thawed
  • 31/2 cups water
  • ½ cup cornstarch
  • 11/2 cups heavy cream
  • 2 cups shredded sharp Cheddar cheese
  • 1 cup milk, for thinning the soup, if desired

Instructions

  1. Melt butter over medium heat in a large saucepan or Dutch oven. Add the celery, onion, thyme, salt, and pepper. Sauté until onion is tender—about 5 minutes.
  2. Add the stock cubes, broccoli, and 3 cups of water. Bring to boil, cover, and reduce heat to low. Simmer 15 minutes.
  3. Mix the cornstarch and the ½ cup water. This is a lot of cornstarch, but you want it to become the consistency of a pudding so you must use a lot. Stir in the cornstarch and when bubbles begin to rise to the surface, slowly add the heavy cream, blending well. Stirring constantly, add the shredded cheese and stir until melted.
  4. If the consistency is too thick for you taste, you can thin to the desired consistency using the milk. Use just enough milk to get it to the consistency you prefer. I use about
  5. ¼ cup of milk, but the amount may vary depending on your preference.
  6. Serve immediately (as thickened products that use a cornstarch base will break down quickly).

Nutrition Information:

Yield:

8

Serving Size:

1

Amount Per Serving: Calories: 922Total Fat: 86gSaturated Fat: 53gTrans Fat: 3gUnsaturated Fat: 26gCholesterol: 262mgSodium: 1174mgCarbohydrates: 19gFiber: 1gSugar: 6gProtein: 22g

Did you make this recipe?

I would love to see! Tag me on Instagram @lynsey.kmetz or use the buttons below to share it on Pinterest! Thanks for your support!

© Moscato Mom

Check out The Cupboard to Table Cookbook: Satisfying Meals Made From What You Have on Hand available now for preorder on Amazon.com. 

Do you like Broccoli Cheddar Soup?

Buffalo Chicken Mac - Meals Made Easy With Kraft

By 4 Comments

For as long as I can remember, Kraft Macaroni & Cheese has been a staple in my household. As a little girl, I remember piling those little blue boxes in my mom's shopping cart. When I was a teenager I remember preparing Kraft Macaroni & Cheese for the children I was sitting for... while eating some myself of course. Now as a mom I love serving Kraft Macaroni & Cheese to my family. It has always been my "go to" side, but I never thought to make it as a main dish. When I saw the recipe for Buffalo Chicken Mac on the Kraft Recipe Hub I knew I had to try it - and make our "favorite side" a new "favorite dish."

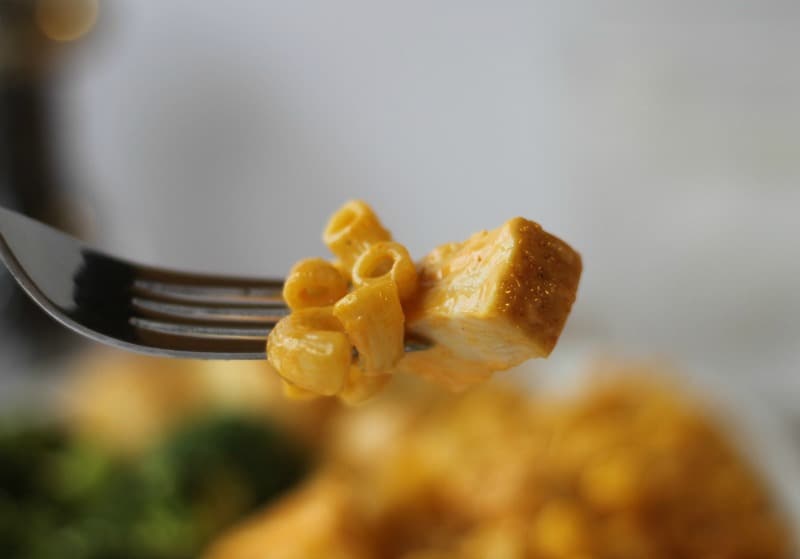
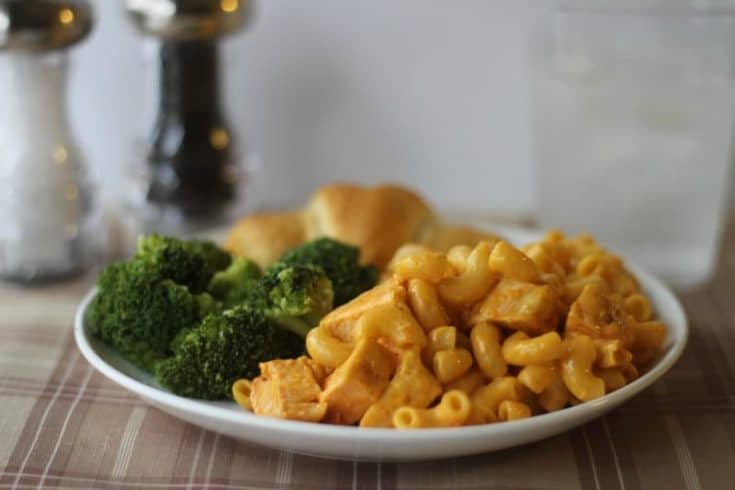
kraft buffalo mac

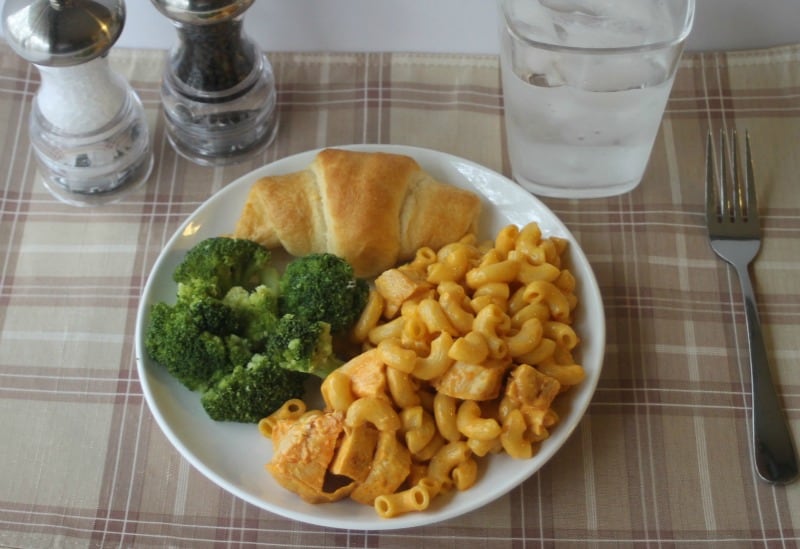
This recipe was not only super tasty, but super easy. In fact, I had all of the recipes on hand. This would be perfect for a party or for an every day meal for your family. The creaminess of the Kraft Deluxe mixed with the zing of the buffalo sauce made this an easy favorite.

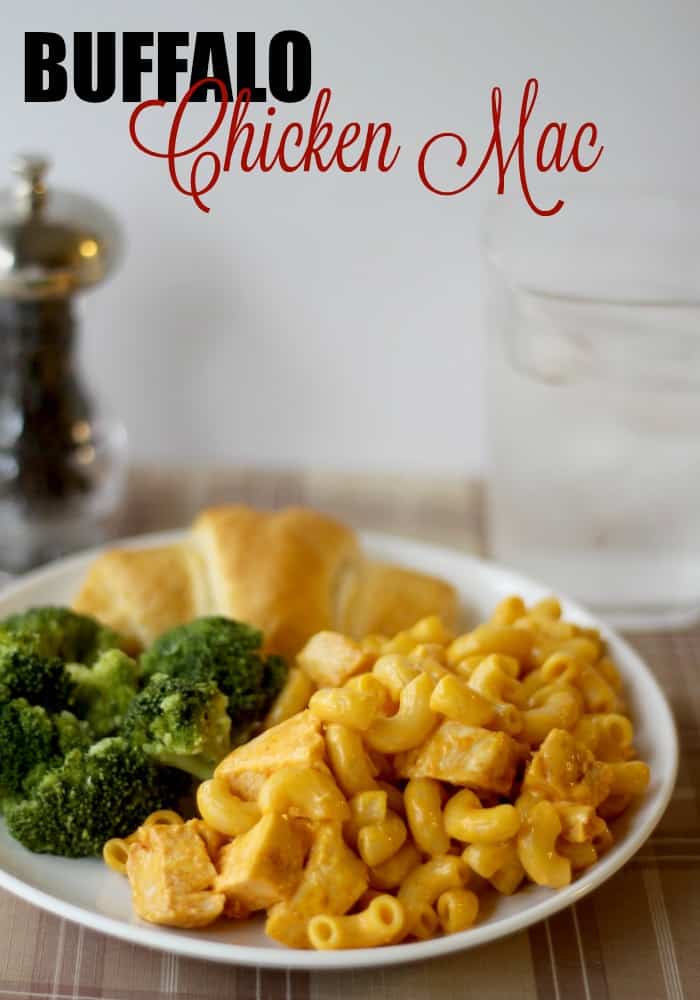
buffalo mac

The original recipe calls for green onions, but we have recently found out that Mike is actually allergic to onions, so I left that part out. I paired it with some fresh steamed broccoli and hot rolls and it was the perfect meal. Better yet it only took about 30 minutes to make from start to finish and we had enough for my family of four plus leftovers for lunch the next day.

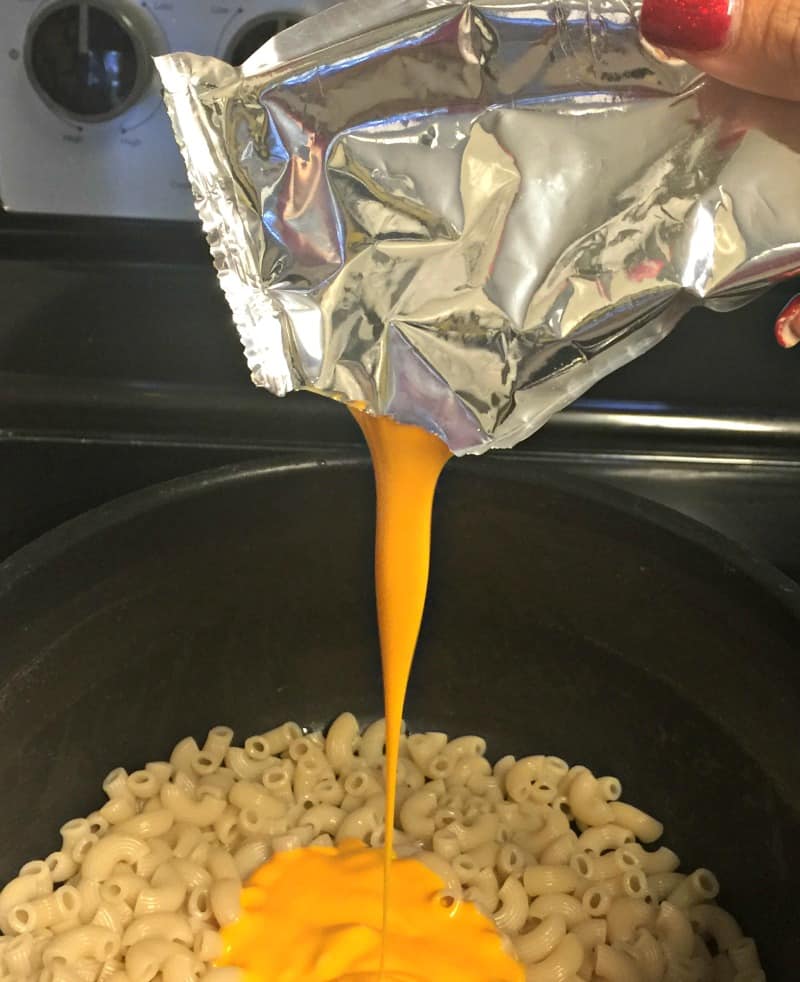
I cooked my chicken breasts using the NuWave, but you can cook it however you want. To save time you could even pick up a rotisserie chicken and shred it. This would even be great to make with leftover turkey! This recipe is so easy even the girls can make it - especially since there is no need for a bunch of measuring. Kraft Deluxe cheese sauce is already ready to go - simply snip the corner and pour.

kraft deluxe
kraft mac and cheese

Kraft is a great way to make every day delicious! In the Kraft Recipe Hub you will find recipes for every meal and every occasion. They even have some delicious looking desserts that I am going to have to try! There are also great coupons available so you can stock up on your favorite Kraft foods!

This will for sure be put in our family meal rotation and I bet if you try it just one time - it will become one of your family favorites too! Make every day delicious - with Kraft!

Yield: 6

Buffalo Chicken Mac

Buffalo Chicken Mac

Liven up your mac and cheese with this Buffalo Chicken Mac and Cheese Recipe that the whole family will love.

Prep Time 10 minutes
Cook Time 20 minutes
Total Time 30 minutes

Ingredients

  • 1 pkg., (14 oz.) KRAFT Deluxe Macaroni & Cheese Dinner
  • 1-½ cups chopped cooked chicken breasts
  • 1 Tbsp. Buffalo wing sauce
  • ½ cup KRAFT Shredded Cheddar Cheese
  • 1 Tbsp. chopped green onions, (optional)

Instructions

  1. HEAT oven to 425°F.
  2. PREPARE dinner in large saucepan as directed on package.
  3. TOSS chicken with wing sauce; stir into Dinner.
  4. Spoon into 1-½ Qt. casserole sprayed with cooking spray; top with shredded cheese.
  5. BAKE 5 to 10 min. or until cheese is melted. Sprinkle with onions.

Nutrition Information:

Yield:

6

Serving Size:

1

Amount Per Serving: Calories: 159Total Fat: 7gSaturated Fat: 3gTrans Fat: 1gUnsaturated Fat: 4gCholesterol: 40mgSodium: 262mgCarbohydrates: 8gFiber: 0gSugar: 2gProtein: 15g

Did you make this recipe?

I would love to see! Tag me on Instagram @lynsey.kmetz or use the buttons below to share it on Pinterest! Thanks for your support!

© Moscato Mom
Cuisine: American / Category: Main Dishes
buffalo chicken mac from kraft

A Keto Christmas - Chicken Alfredo Recipe

By Leave a Comment

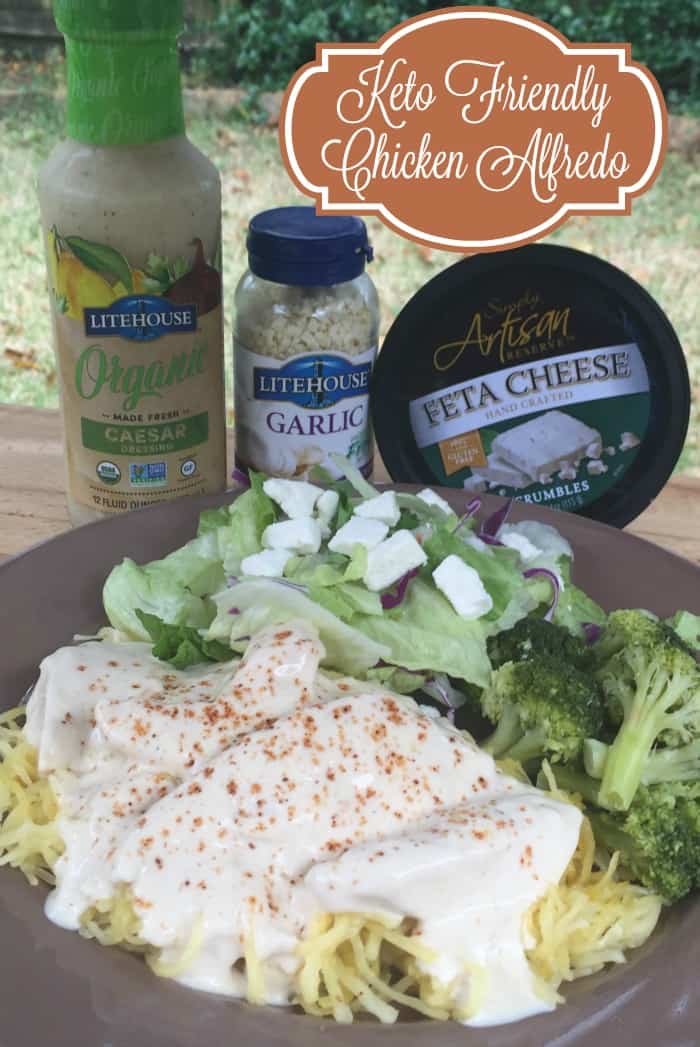
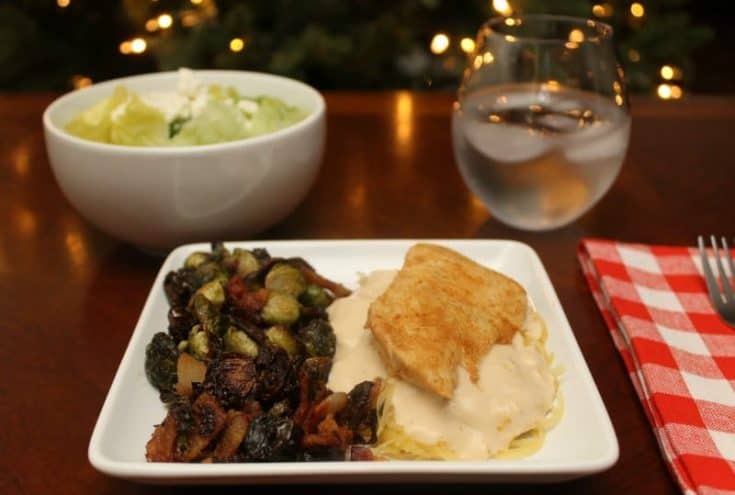
I am really excited to be hosting our Christmas Eve Family Dinner this year. I have hosted Thanksgiving for the last few years, but the Christmas Eve meal is a big deal. Since I have begun eating Keto I want to show my family just how delicious eating low carb can be. So I decided to make one of my all time favorites for dinner - Spaghetti Squash Chicken Alfredo - using my favorite ingredients.

keto chicken alfredo

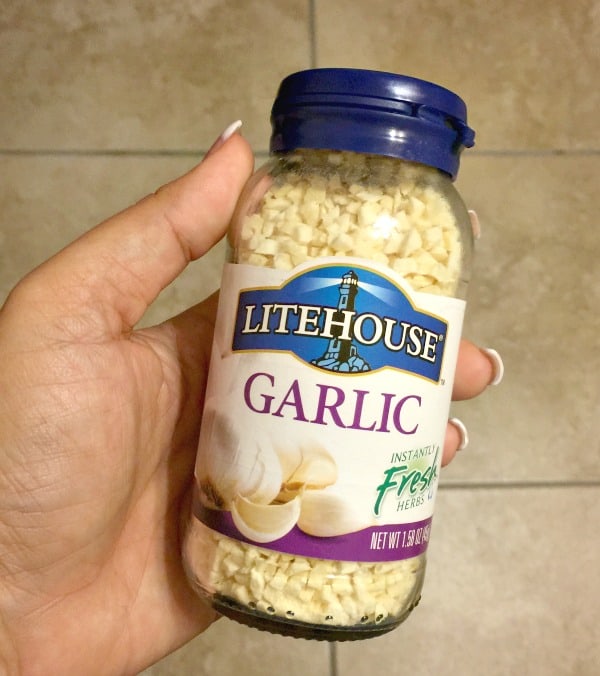
Litehouse Foods offers a wide variety of Salad Dressing flavors along with Caramel, Fruit dips, Glaze, Herbs, Veggie dips, and Cheese crumbles. My favorite product of theirs though is their Instantly Fresh Herbs which you simply add water to rehydrate. The Litehouse Garlic has become a staple in this house that I have used for everything from omelets to spaghetti sauce. It is perfect for my homemade alfredo - which we eat no less than once a week it seems. This Christmas Eve I am excited to use Litehouse to "Holidazzle" my loved ones with my favorite dish!

litehouse garlic

I love this recipe because it is super quick, but also savory and filling - perfect for these cold winter nights. And since I use spaghetti squash instead of pasta, no one gets the "carb coma" after eating. Plus I always make a double batch so I can have leftovers for lunch! Truth be told I end up pouring the Alfredo on all the things... but that's ok. It's keto! Pair it with a fresh salad using Litehouse Cheese Crumbles and Litehouse Organic Caesar dressing and voila! Dinner is served! I think this will look perfect for our holiday meal - don't you?

Yield: 4

Keto Chicken Alfredo

Keto Chicken Alfredo

Chicken Alfredo is a keto staple! This deliciously simple recipe is made with one of my favorite secret ingredients.

Prep Time 10 minutes
Cook Time 20 minutes
Total Time 30 minutes

Ingredients

  • 4 boneless skinless chicken breasts
  • 4 tablespoon butter
  • 1 tablespoon Litehouse Garlic
  • 1 cup heavy cream
  • 5 tablespoon grated parmesan
  • a pinch of ground nutmeg
  • salt and pepper to taste

Instructions

  1. Begin by melting butter in a hot skillet.
  2. Add in your chicken breasts and cook through – turning often. The butter will caramelize to the pan – that is ok – you want all that goodness in your sauce.
  3. When the chicken is finished, move to a plate and set aside.
  4. Turn the heat down to low and add in heavy cream and garlic to your skillet. Use a spatula to scrape the yumminess that is stuck to the bottom of your skillet.
  5. Add in remaining ingredients and let simmer on low for about 5 minutes – stirring often to prevent scorching.
  6. Add chicken back to sauce or chose to serve it on top – totally up to you!
  7. Serve with your favorite veggie and a tossed salad.

Nutrition Information:

Yield:

4

Serving Size:

1

Amount Per Serving: Calories: 532Total Fat: 39gSaturated Fat: 23gTrans Fat: 1gUnsaturated Fat: 13gCholesterol: 205mgSodium: 383mgCarbohydrates: 3gFiber: 0gSugar: 2gProtein: 41g

Did you make this recipe?

I would love to see! Tag me on Instagram @lynsey.kmetz or use the buttons below to share it on Pinterest! Thanks for your support!

© Moscato Mom
Cuisine: American / Category: Main Dishes
holidazzle_woobox_enterypage_720

Litehouse Foods is holding a contest to show off how you "Holidazzle" your meals this season! All you have to do is snap a photo of your delicious meals using Litehouse or Simply Artisan Reserve products, and share on Twitter or Instagram using the hashtag #LitehouseHolidazzle for your chance to win! Three lucky winners will receive $1,000 to use for groceries and a year's supply of Litehouse Dressing! You can also save on your HoliDazzle recipe with this great LiteHouse Foods Coupon!

Healthy Halloween Chicken Pot Pie Recipe

By 45 Comments

Make this Jack-O-Lantern Healthy Chicken Pot Pie Recipe for a fun and festive Halloween dinner!

I love Fall.  It is my absolute favorite time of year.  Though I don't like COLD weather, I do like nice crisp mornings and snuggling up with Mike in front of the fire in the evenings... following an amazingly tasty meal.  This year I am already preparing for the holidays by making recipes that are as healthy as they are delicious - and even sometimes making myself a completely different meal than my family... after all, *I* am on this diet, not them.

Tonight I made my very first ever Chicken Pot Pie - a "healthy-ish" version for me, and a "normal" version for them.  To be honest... I could not tell the difference between the two.  Both of them were delicious and I am excited to have a new, simple meal to add to my repertoire.

Yield: 1

Healthy Halloween Chicken Pot Pie Recipe

Healthy Halloween Chicken Pot Pie Recipe

This Healthy Chicken Pot Pie is delicious any time of year - but it is especially perfect for Halloween!

Prep Time 10 minutes
Cook Time 30 minutes
Total Time 40 minutes

Ingredients

  • 1 ½ c 2% milk
  • 1 medium onion, , chopped
  • 2 rotisserie chicken breasts – cubed
  • 3 tablespoon flour
  • 1 teaspoon poultry seasoning
  • ½ teaspoon pepper
  • 1 98 % fat free can cream of chicken soup
  • assorted canned vegetables – corn, , lima beans, green beans, carrots, etc
  • 2 pie crusts

Instructions

  1. In a medium sauce pan, mix milk, pepper, flour, and poultry seasoning together over medium heat.
  2. Stir in chopped onion and cook about 4 minutes or until sauce is thickening and onions are soft.
  3. Add cream of chicken soup and mix well.
  4. Slowly add in cooked chicken and vegetables and mix well, lowering heat to low.
  5. Spoon mixture into empty pie crust. Gently lay second pie crust over top and using a sharp knife, cut out eyes, nose, and mouth and discard cutouts. Use extra dough to make a “stem” if desired.
  6. Bake 30-35 minutes or until edges are bubbly and crust is browned.
  7. Serve hot.

Nutrition Information:

Yield:

8

Serving Size:

1

Amount Per Serving: Calories: 456Total Fat: 21gSaturated Fat: 6gTrans Fat: 0gUnsaturated Fat: 12gCholesterol: 78mgSodium: 737mgCarbohydrates: 40gFiber: 4gSugar: 7gProtein: 29g

Did you make this recipe?

I would love to see! Tag me on Instagram @lynsey.kmetz or use the buttons below to share it on Pinterest! Thanks for your support!

© Moscato Mom
Cuisine: American / Category: Main Dishes

My Dad came over tonight and the five of us absolutely LOVED these pies.  I do not know that I have ever eaten a chicken pot pie before, but after tasting this one, I know this will be something we make often during the cool nights of Fall and Winter.  I wonder if I can cut a turkey into the top crust... hmmm...

Chicken Marsala Pasta Recipe

By Leave a Comment

When I first began on Pinterest, I spent what felt like 16 hours a day pinning recipes. At that time I truly did not know how to cook, and I was certain that Pinterest was going to change all of that.

Thankfully it did, and I have had huge successes like my Cowboy Casserole (that has also been repinned over ten thousand times) and my Simple Chicken Pot Pie which continues to be a family favorite.

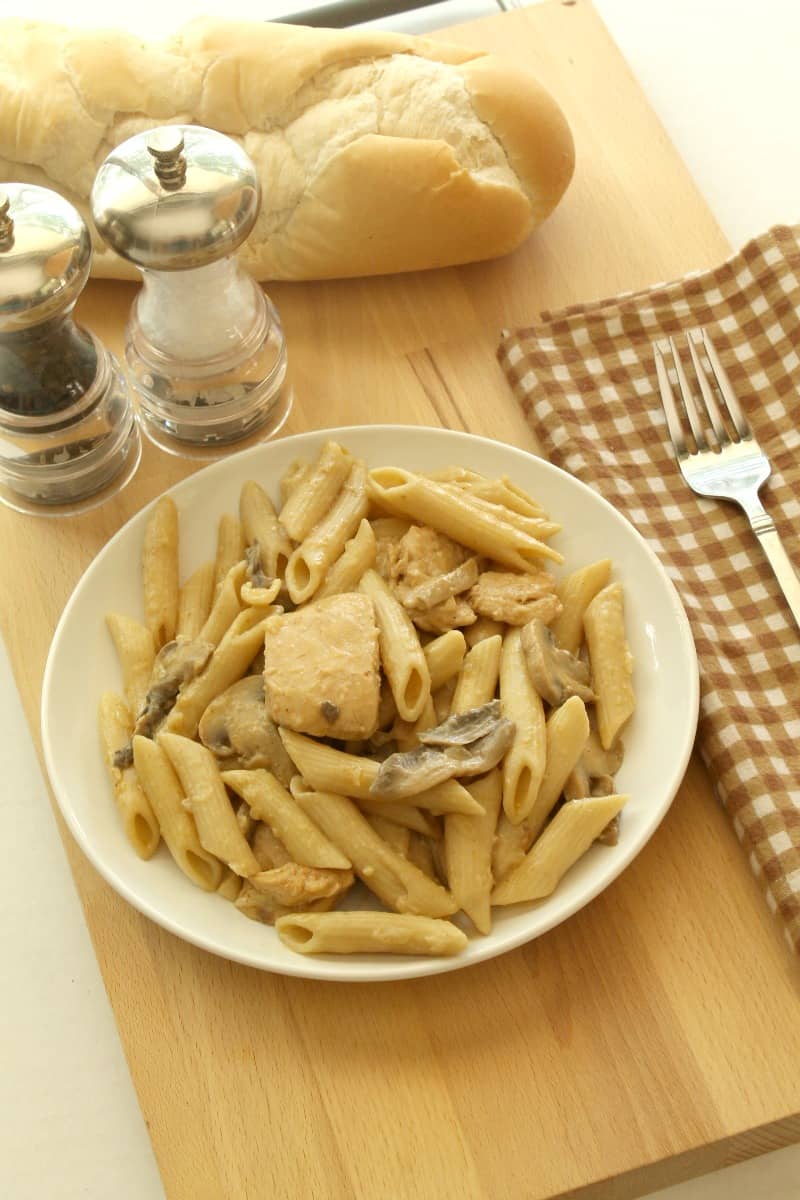
This week though I wanted to stretch my culinary skills and try something a little more complex. I looked back over my pins from the early days and found one for a Chicken Marsala Pasta... except that the link was incorrect.

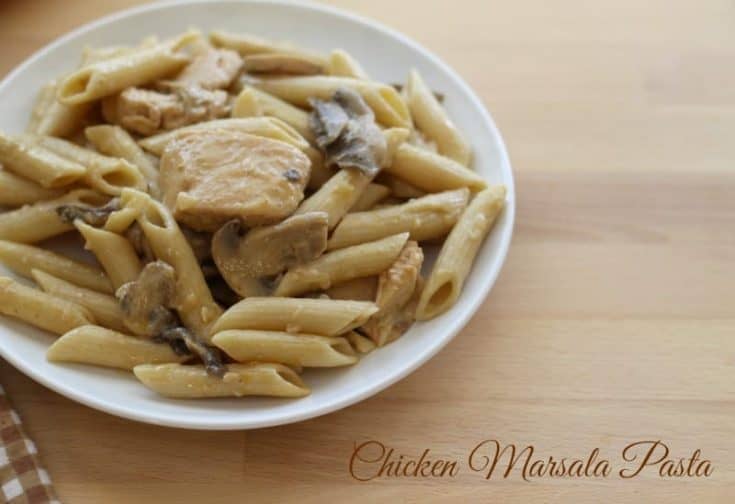
So I did a little more research, got the "jist" of the recipe, and headed off to the kitchen with the goal to to concoct a masterpiece... which is exactly what I did.

chicken marsala pasta
Yield: 8

Chicken Marsala Pasta Recipe

Chicken Marsala Pasta Recipe

Chicken Marsala Pasta is a hot savory dish full of flavor. Perfect for large family-style dinners or make ahead for weekly meal prep.

Prep Time 10 minutes
Cook Time 30 minutes
Total Time 40 minutes

Ingredients

  • 4 boneless, skinless chicken breasts, cubed
  • 1 can sliced mushrooms
  • 1 small yellow onion, finely diced
  • 1 teaspoon minced garlic
  • 4 tablespoons olive oil, divided
  • 1 ½ cups marsala cooking wine
  • 1 cup heavy whipping cream
  • ½ cup chicken broth
  • 1 cup grated parmesan cheese
  • 1 box penne pasta

Instructions

  1. Begin by cooking penne pasta according to package directions. Set aside when finished.
  2. In a large skillet, add 2 tablespoons of olive oil and heat to medium heat. Cook chicken completely until lightly browned on all sides. Move chicken to a plate and set aside.
  3. Add remaining 2 tablespoons of olive oil to skillet and add diced onion, mushrooms, and minced garlic. Cook until onion is translucent and soft – about 5-7 minutes – stirring often to prevent sticking. Place chicken back in to skillet.
  4. Add in marsala, chicken broth, and whipping cream and bring to a boil. Turn heat down to medium and let simmer until sauce begins to thicken.
  5. Add in cooked pasta and stir gently. Let mixture continue to simmer about five minutes – stirring often.
  6. Finish by stirring in parmesan cheese and removing from heat. Let sit five minutes before serving. Voila!

Nutrition Information:

Yield:

8

Serving Size:

1

Amount Per Serving: Calories: 379Total Fat: 23gSaturated Fat: 10gTrans Fat: 0gUnsaturated Fat: 11gCholesterol: 96mgSodium: 610mgCarbohydrates: 12gFiber: 0gSugar: 2gProtein: 24g

Did you make this recipe?

I would love to see! Tag me on Instagram @lynsey.kmetz or use the buttons below to share it on Pinterest! Thanks for your support!

© Moscato Mom
Cuisine: American / Category: Main Dishes

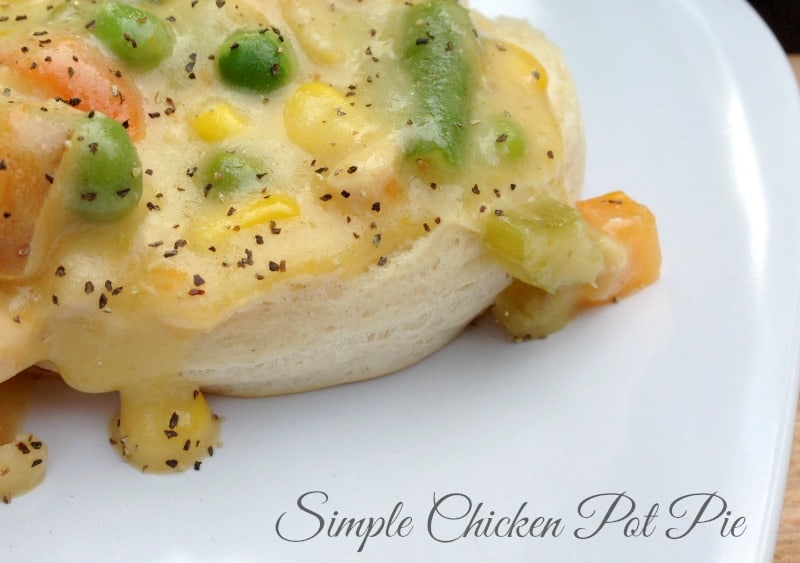
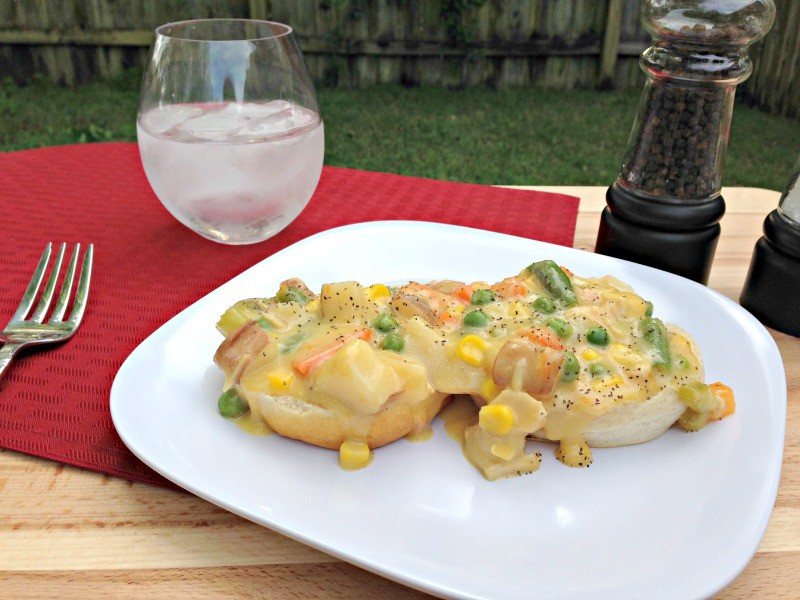
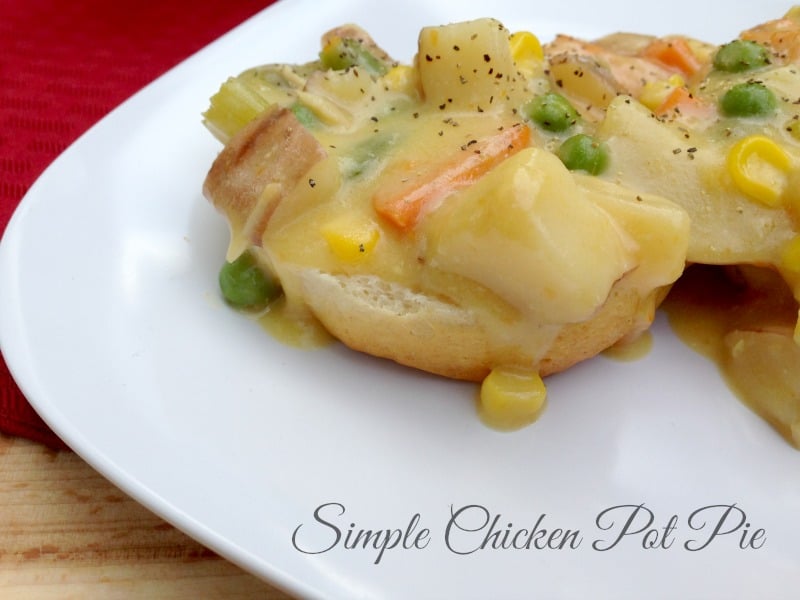
Simple Chicken Pot Pie Recipe

By 6 Comments

I am not sure why, but growing up I always said I "hated" chicken pot pie. I am not sure why I thought that - since I honestly couldn't ever remember actually trying a chicken pot pie, but I always thought that I did not like it. When I met Mike I quickly learned it was one of his all time favorites - loosely translating into "Lynsey you better figure out how to cook this." I set out to create the perfect chicken pot pie - having no intention of even taste testing along the way. However, after a couple of attempts I concocted one that smelled so good while cooking, I could not resist trying it once it was finished. I've been hooked ever since.

chicken pot pie

This recipe is super simple - and super delicious. You can prepare it as a traditional pot pie, or - how my family prefers it - a "deconstructed" version over your favorite biscuits. Unlike most chicken pot pies that take forever to cook, this one takes less than 30 minutes from start to finish - and that includes chopping the onion!

chicken pot pie

This is one recipe we never have leftovers for. The girls literally fight over who gets the last biscuit. One of these days I am going to have to double the recipe so I can have it for lunch the next day. It is so quick and easy and made with ingredients we normally have on hand, so it is perfect for a cold night meal to get us warm inside. Never again will I say I hate chicken pot pie - I LOVE IT!

easy chicken pot pie recipe
Yield: 8

Simple Chicken Pot Pie Recipe

Simple Chicken Pot Pie Recipe

This is the easiest Chicken Pot Pie recipe ever! Great flavor and simple ingredients, this is the perfect weeknight meal in minutes.

Prep Time 20 minutes
Cook Time 20 minutes
Total Time 40 minutes

Ingredients

  • ⅓ cup butter or margarine
  • ⅓ cup finely chopped onion
  • ½ cup celery, , chopped
  • ⅓ cup all-purpose flour
  • ½ teaspoon salt
  • ½ teaspoon garlic powder
  • ½ teaspoon onion powder
  • ¼ teaspoon pepper
  • 1 ¾ cups chicken broth
  • ½ cup milk
  • 1 rotisserie chicken – shredded
  • 1 package frozen mixed vegetables, , steamed
  • 6 small red potatoes, , cubed and boiled
  • 1 can of biscuits -or- pie crusts

Instructions

  1. Melt butter in a saucepan over medium heat.
  2. Add onion and celery and cook, stirring constantly until onions and celery are soft.
  3. Add flour and seasonings and mix well.
  4. Gradually pour in milk and chicken broth, stirring constantly to mix thoroughly.
  5. Stir until it begins to bubble and thickens.
  6. Pour in vegetables, potatoes, and shredded chicken.
  7. Let cook on low for 15 minutes, stirring often to prevent sticking.
  8. Then spoon over baked biscuits or spoon in to pie crusts and bake for an additional 30 minutes or until crust is golden brown.
  9. Let pie stand 5 minutes before serving.

Nutrition Information:

Yield:

8

Serving Size:

1

Amount Per Serving: Calories: 412Total Fat: 18gSaturated Fat: 8gTrans Fat: 0gUnsaturated Fat: 8gCholesterol: 59mgSodium: 699mgCarbohydrates: 46gFiber: 5gSugar: 4gProtein: 17g

Did you make this recipe?

I would love to see! Tag me on Instagram @lynsey.kmetz or use the buttons below to share it on Pinterest! Thanks for your support!

© Moscato Mom
Cuisine: American / Category: Main Dishes

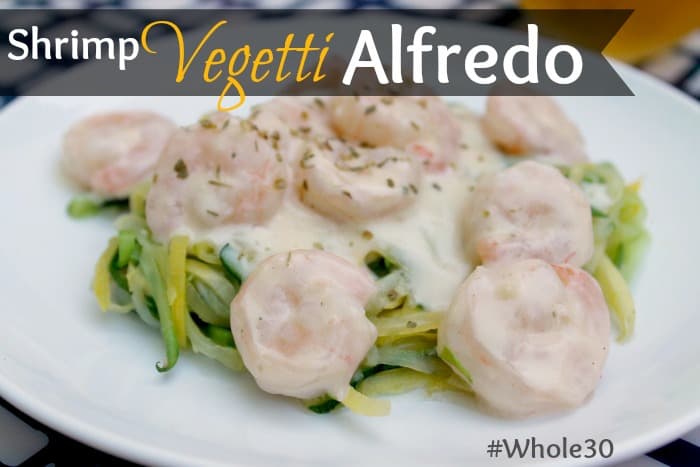
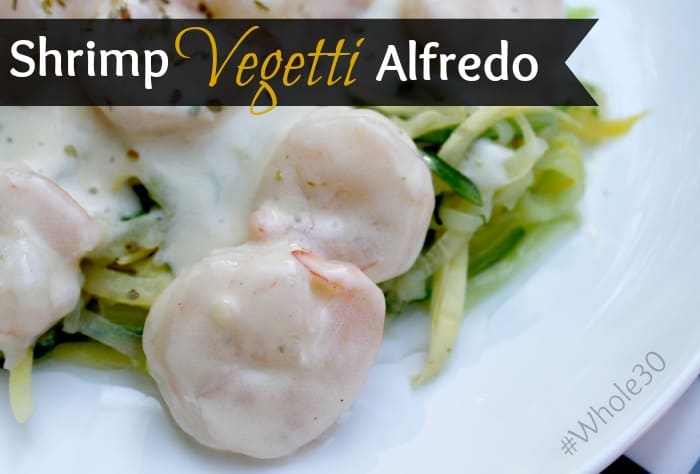
Shrimp Vegetti Alfredo Whole30

By 14 Comments

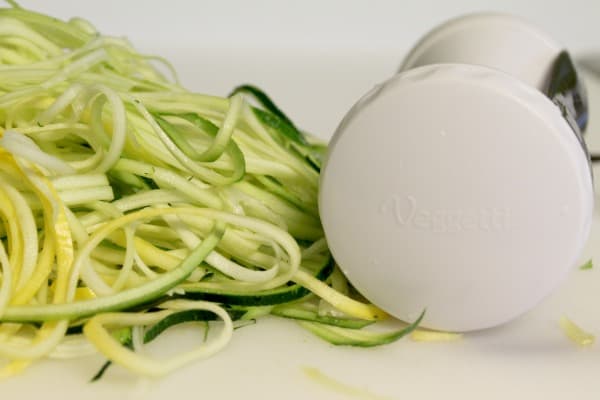
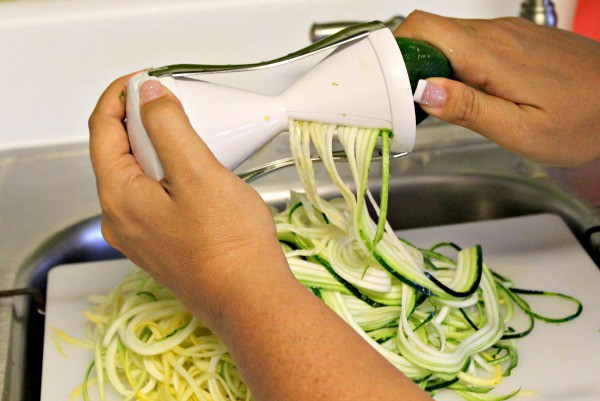
A few weeks ago a friend of mine posted on Facebook that she "may never eat pasta again" after discovering the Vegetti. The Vegetti is a hand held vegetable spiralizer that lets you turn vegetables like squash, zucchini, and carrots into thin cut spiral "noodles." Oh, and it is less than 20 bucks!! I was a bit skeptical, but thought I would give it a shot. It has become one of my all time favorite kitchen gadgets.

vegetti spiralizer

Since starting Whole30 I have missed pasta so bad. Like really bad. Like had to talk myself out of cheating at least 3 times a week bad. So I was stoked to try the vegetti and see if I could have "pasta" again. I opted to go for alfredo (go big or go home, right?) using a Paleo Alfredo recipe made from cauliflower. In a word.... ahmayzing.

Shrimp Vegetti Alfredo Whole30

Shrimp Vegetti Alfredo Whole30

Shrimp Vegetti Alfredo is a super quick meal with tons of flavor.

Prep Time 10 minutes
Cook Time 10 minutes
Total Time 20 minutes

Ingredients

  • 2 medium zucchini
  • 2 medium yellow squash
  • ½ pound shrimp, peeled and deveined
  • 3 tablespoon olive oil
  • 4 cups cauliflower, chopped (1 head)
  • ½ cup chicken broth
  • 1 cup of coconut milk
  • ½ teaspoon salt
  • 2 teaspoon garlic powder
  • 1 teaspoon Season All Salt

Instructions

  1. First, you want to make your alfredo sauce. First, microwave your cauliflower in a microwave safe bowl with a bit of water until soft.
  2. Put cauliflower, chicken broth, coconut milk, salt, and garlic powder into your food processor and puree until thin.
  3. This will take a few minutes. In fact, I may have let it go too long because it was very very thin…
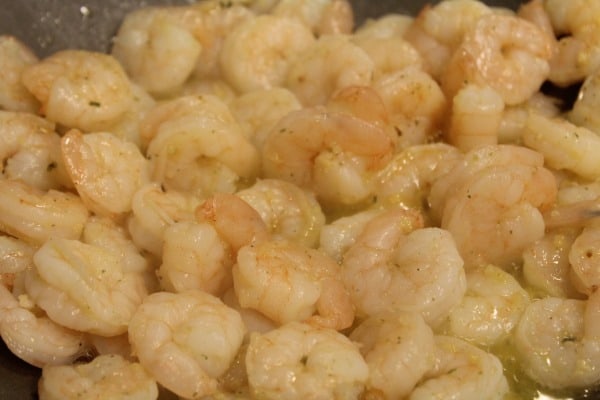
  4. Next, sauté your shrimp in olive oil and season all salt until done, and add to alfredo sauce.
  5. Transfer sauce and shrimp into a pan and warm on the stove to let the flavors mix together well.
  6. Finish by spiralizing your zucchini and yellow squash using your Vegetti. This takes just a few minutes and actually was fun. As I said, I was skeptical before, so I was pleasantly surprised when this worked as well as it did.
  7. Bring a pot of water to a boil and add your spiralized “noodles” for 2-3 minutes, until they are the softness that you want them. Be careful – overcooking makes them mushy. (I have since learned that you can also sauté the “noodles” in garlic and olive oil for even more flavor!)

Nutrition Information:

Yield:

4

Serving Size:

1

Amount Per Serving: Calories: 355Total Fat: 25gSaturated Fat: 13gTrans Fat: 0gUnsaturated Fat: 10gCholesterol: 120mgSodium: 1500mgCarbohydrates: 19gFiber: 7gSugar: 9gProtein: 20g

Did you make this recipe?

I would love to see! Tag me on Instagram @lynsey.kmetz or use the buttons below to share it on Pinterest! Thanks for your support!

© Moscato Mom
Cuisine: American / Category: Main Dishes
shrimp
vegetti reviews

Drain your "noodles" well in a colander and serve like you would your favorite pasta alfredo dish!

whole30 alfredo recipe

Enjoy!

~Lynsey

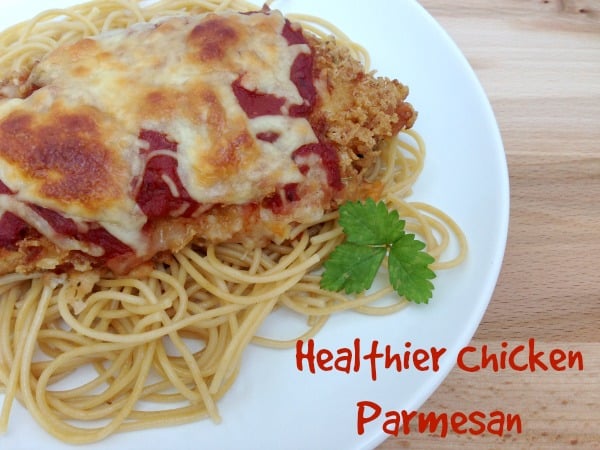
Healthier Chicken Parmesan

By 1 Comment

Last week I was approached by Tuttorosso Tomatoes to talk about their newest promotion - #CelebrateYourTradition - where you can enter to win a prize package of $550 just for sharing one of your family's favorite traditions and who inspired it! Since I have already shared my Dad's Simple Spaghetti Recipe (in which I also use Tuttorosso Tomatoes) I decided to make one of Mike's favorites - Chicken Parmesan.

And since we are both wanting to eat healthier I made just a few small adjustments to bring down the calories, without giving up any of the flavor. What we ended up with was something all four of us agreed was the best meal to come out of my kitchen.

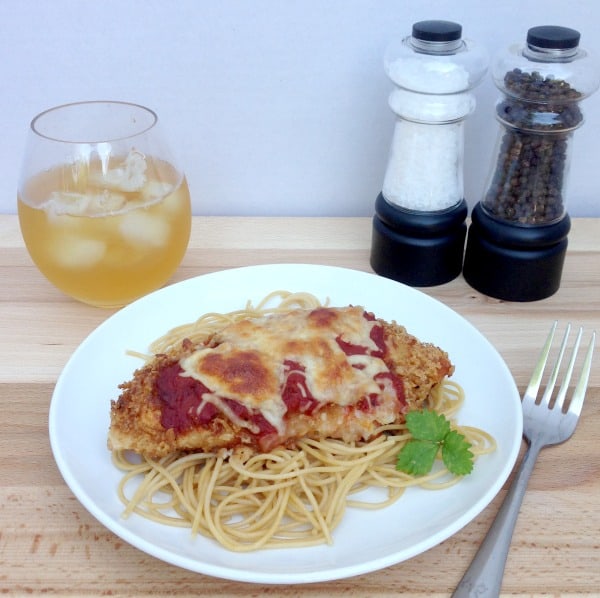
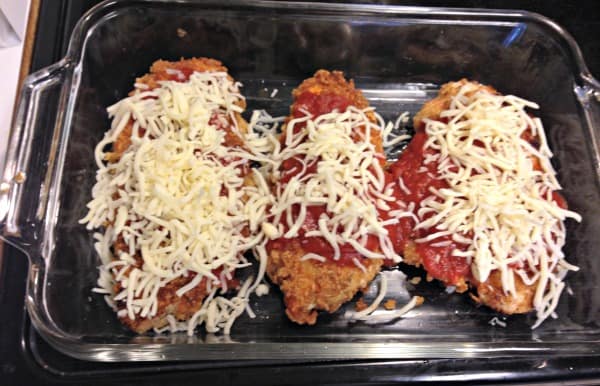
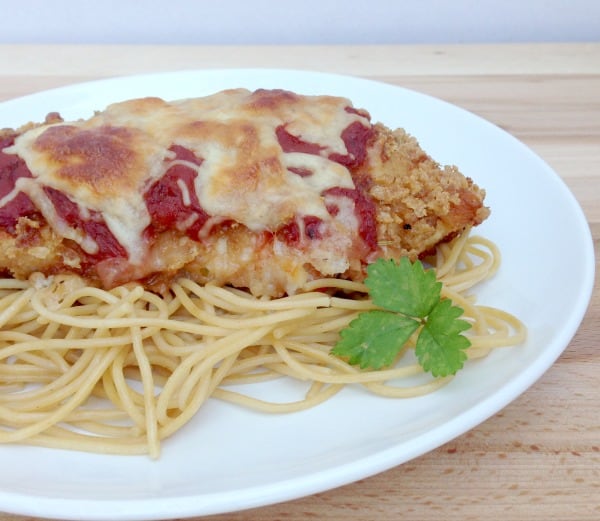
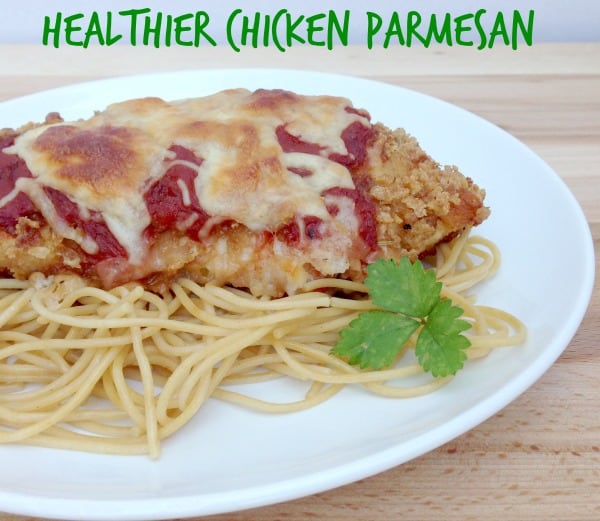
chicken parm recipe
chicken parmesan 1
homemade chicken parmesan 2
homemade chicken parmesan 1

This meal was loved so much I know it is going to be a new "tradition" that we will do around here often. And since it is healthier than restaurant style chicken parmesan - we can feel better about making it from home.

I can also attest to the fact that it is even better the next day - as I am sitting here having the leftovers for lunch! And according to my calculations in MyFitnessPal, each serving is less than 320 calories. Talk about Guilt Free Deliciousness!

Yield: 4

Healthier Chicken Parmesan – Tuttorosso Tomatoes

Healthier Chicken Parmesan – Tuttorosso Tomatoes

Save on carbs and calories without losing flavor with this Healthier Chicken Parmesan.

Prep Time 20 minutes
Cook Time 30 minutes
Total Time 50 minutes

Ingredients

  • 4 boneless skinless chicken breasts
  • 1 teaspoon dried Italian seasoning
  • ½ c flour
  • ½ teaspoon salt
  • ½ teaspoon pepper
  • 3 egg whites
  • ½ c water
  • 2 cups Rice Chex cereal, , crushed
  • 2 tablespoons grated parmesan cheese
  • 4 tablespoon olive oil
  • 1 can Tuttorosso No Salt Added Crushed Tomatoes
  • 1 c shredded low fat mozzarella cheese
  • whole wheat pasta

Instructions

  1. Preheat oven to 425*. In one bowl lightly beat egg whites and water together.
  2. In another bowl put flour, salt, and pepper.
  3. In another bowl, mix crushed Rice Chex with Italian seasoning.
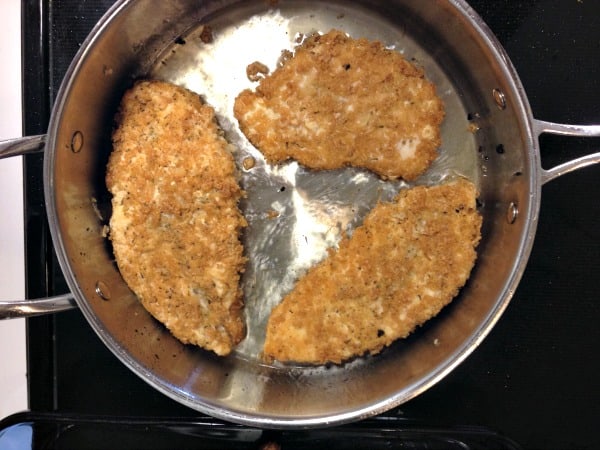
  4. Working with one chicken breast at a time, first coat with flour, then dredge through egg white mixture and then place into the cereal mix and press until well coated on both sides.
  5. Put Olive oil into a large skillet and heat over medium heat.
  6. Place pieces of coated chicken into skillet and cook until chicken is just cooked through – about 3 minutes on each side.
  7. Then transfer chicken to a 9 x 13 baking dish and top each piece evenly with crushed tomatoes and mozzarella cheese.
  8. Bake until the cheese is melted and lightly browned and chicken is completely cooked – about 20-25 minutes.
  9. Serve over whole wheat pasta.

Nutrition Information:

Yield:

4

Serving Size:

1

Amount Per Serving: Calories: 633Total Fat: 24gSaturated Fat: 6gTrans Fat: 0gUnsaturated Fat: 16gCholesterol: 118mgSodium: 770mgCarbohydrates: 51gFiber: 6gSugar: 11gProtein: 54g

Did you make this recipe?

I would love to see! Tag me on Instagram @lynsey.kmetz or use the buttons below to share it on Pinterest! Thanks for your support!

© Moscato Mom
Cuisine: American / Category: Main Dishes
tuttorosso

Head over to the Tuttorosso Facebook Page to share your favorite family tradition and enter to win a prize pack worth over $550!

Mango Chicken Quesadillas - Cinco de Mayo

By Leave a Comment

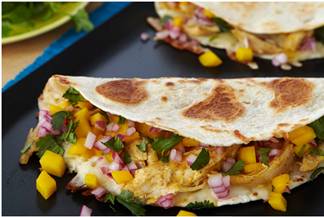
In just a few weeks we will be celebrating Cinco de Mayo - one of my favorite holidays. Mike's Mom is Mexican and has taught me how to cook some of THE most amazing dishes. Seriously I could eat Mexican food all day every day. One of the highlights of my trip to Cozumel was all of the Mexican food! Today this recipe landed in my inbox and I can not wait to try it. Everything about it - including it being healthy - sounds like something I could just devour. Plus I love any recipe that doesn't require a ton of cooking - hey, quick and easy is how I do food around here.

Cinco de Mayo commemorates the Mexican army’s victory over France at the Battle of Puebla during the Franco-Mexican War, and has evolved into a celebration of Mexican culture and heritage. Celebrations in the United States often extend beyond the actual day to encompass an entire week, with parades, festivals and fiestas that include music, dancing, and food. A dish like Mango Chicken Quesadillas takes the very traditional Mexican dish but combines shredded chicken with brown mustard, honey and Tabasco creating a flavorful filling and adding mango for a sweet twist. By preparing the meal on the IMUSA Cast Aluminum Comal the food is made healthier and the non-stick surface leaves clean up a breeze. Bringing a vigorous, home-style aroma to the party, this traditional Mexican dish will smells as delicious as it tastes.

mango chicken quesadillas

[Read more...]

Simple Thai Lettuce Wraps

By 5 Comments

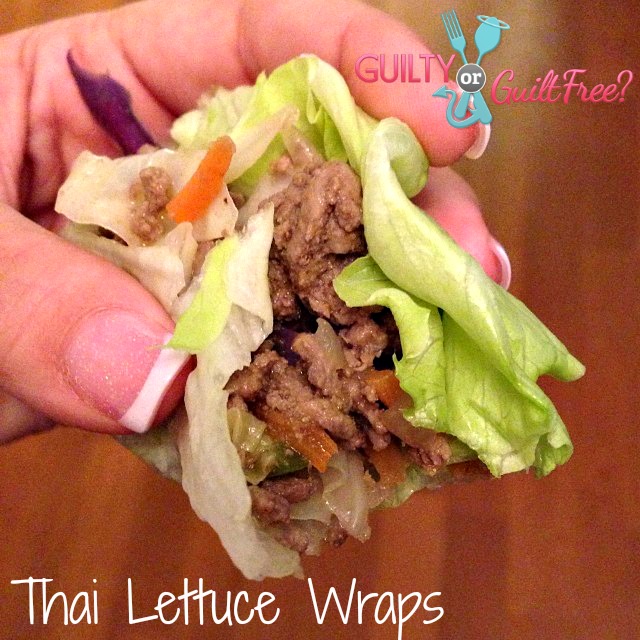
These Keto Thai Lettuce Wraps are a dairy-free keto meal that everyone will love! Simple ingredients, tons of flavor and perfect for feeding a crowd or for weekly meal prep!

thai lettuce wraps

Last week my personal trainer and I were discussing nutrition and I asked for a couple ideas of healthy meals to make that were "out of the norm" of my usual chicken and broccoli routine.  

As much as I love chicken and broccoli - varying the flavors with the different seasonings - it has gotten... well...boring. One of the recipes he suggested was Thai Ground Beef from the Gourmet Nutrition Cookbook.  I had actually never tried Thai food but the recipe looked easy enough, so I gave it a shot.  

Looking For More Keto Recipes? Check out my entire Library Here.

I knew I wanted to blog it if it was good... but we ended up eating the entire first batch so I had to make it a second time just to take pictures.  It was ok, though, because we all loved it that much.  

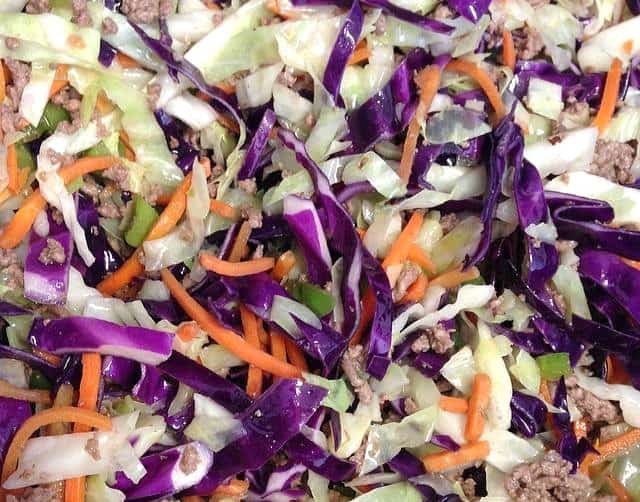
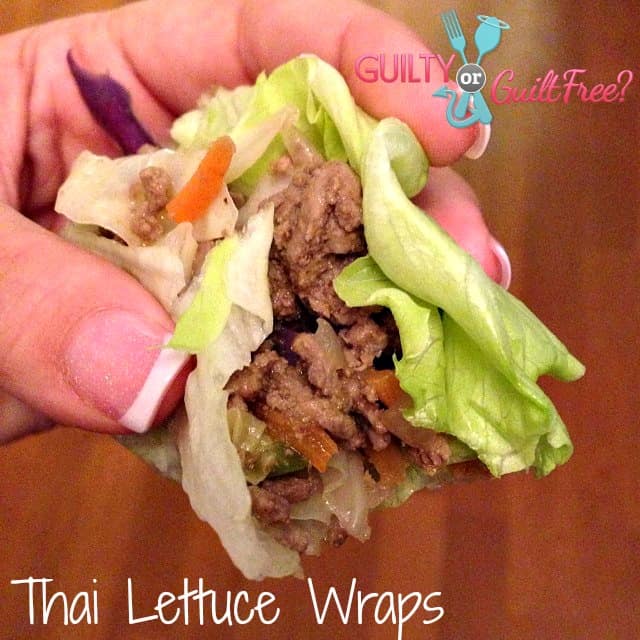
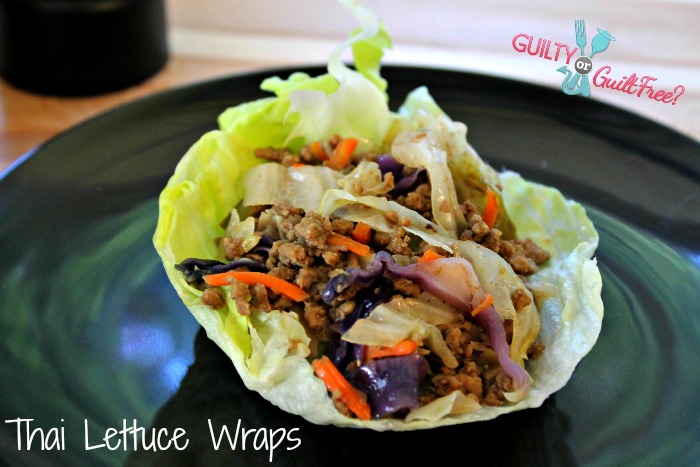
I ended up adding in some red cabbage and putting the Thai Ground Beef Filling into lettuce wraps to make the meal feel "complete."

thai lettuce wraps

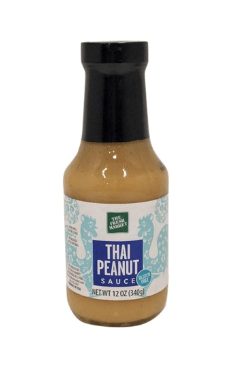
I used the Fresh Market Thai Peanut Sauce which is naturally gluten-free and has terrific flavor without being overpowering.

You can also make this recipe with ground turkey or even ground chicken for delicious Thai Chicken Lettuce Wraps. It is so versatile it has been our family favorite for a long time.

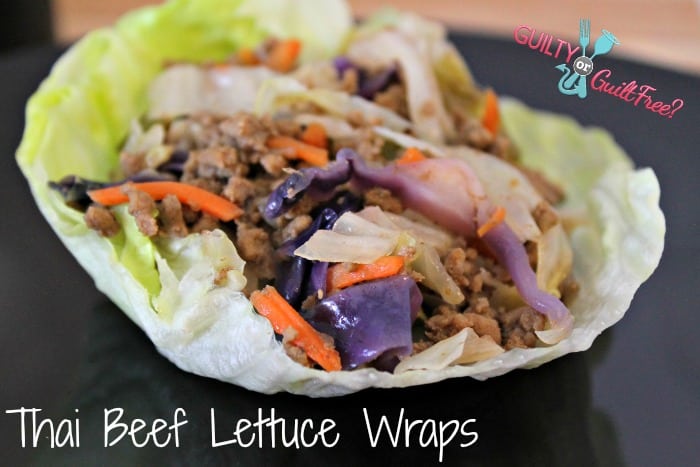
Thai Beef Lettuce Wraps

My favorite part about this easy Thai Lettuce Wraps Recipe is how well it reheats. This is one of those recipes that gets better and better as the flavors combine.

To reheat just simply put the desired amount of filling into a microwave safe bowl, covered with a dampened paper towel, and heat in :30 intervals stirring in between until you reach your desired temperature.

Then spoon into your favorite lettuce leaves or just eat with a fork! So delicious and so good for you!

Thai Lettuce Wraps

Ingredients

  • 1 pound ground beef
  • 3 cups cabbage shredded
  • 2 cups red cabbage shredded
  • 1 cup shredded carrots
  • 1 medium bell pepper, chopped
  • ½ cup peanut sauce
  • lettuce of choice

Directions

Begin by browning ground meat completely until all pink is gone in a large, deep skillet.

Add in cabbages, carrots, and bell pepper and cook down, stirring often until onion is translucent and cabbages are softened.

Pour in peanut sauce and toss to coat well.

Spoon into your choice of lettuce.

Thai Beef Lettuce Wraps

Thai Beef Lettuce Wraps

These Keto Thai Lettuce Wraps are a dairy-free keto meal that everyone will love! Simple ingredients, tons of flavor and perfect for feeding a crowd or for weekly meal prep!

Prep Time 10 minutes
Cook Time 30 minutes
Total Time 40 minutes

Ingredients

  • 1 pound ground beef
  • 3 cups cabbage shredded
  • 2 cups red cabbage shredded
  • 1 cup shredded carrots
  • 1 medium bell pepper, chopped
  • ½ cup peanut sauce
  • lettuce of choice

Instructions

  1. Begin by browning ground meat completely until all pink is gone in a large, deep skillet.
  2. Add in cabbages, carrots, and bell pepper and cook down, stirring often until onion is translucent and cabbages are softened.
  3. Pour in peanut sauce and toss to coat well.
  4. Spoon into your choice of lettuce.

Nutrition Information:

Yield:

12

Serving Size:

1

Amount Per Serving: Calories: 159Total Fat: 9gSaturated Fat: 3gTrans Fat: 0gUnsaturated Fat: 5gCholesterol: 34mgSodium: 212mgCarbohydrates: 9gNet Carbohydrates: 7gFiber: 2gSugar: 5gProtein: 12g

Nutrition calculations based on exact ingredients used and may vary between brands. For exact macro measurements, always calculate your own macros using the exact ingredients that you use.

Did you make this recipe?

I would love to see! Tag me on Instagram @lynsey.kmetz or use the buttons below to share it on Pinterest! Thanks for your support!

© Moscato Mom
Cuisine: American / Category: Easy Recipes

Slow Cooker Puerto Rican Shredded Pork

By 17 Comments

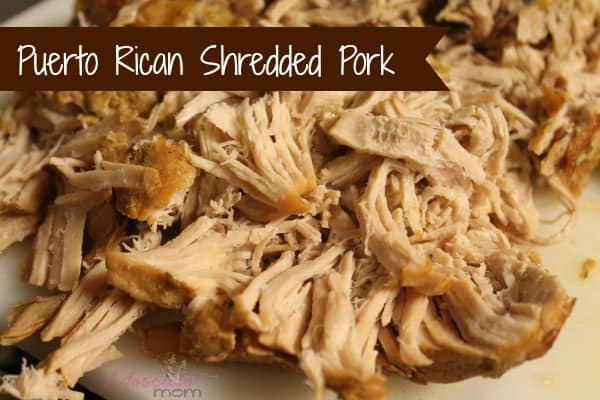
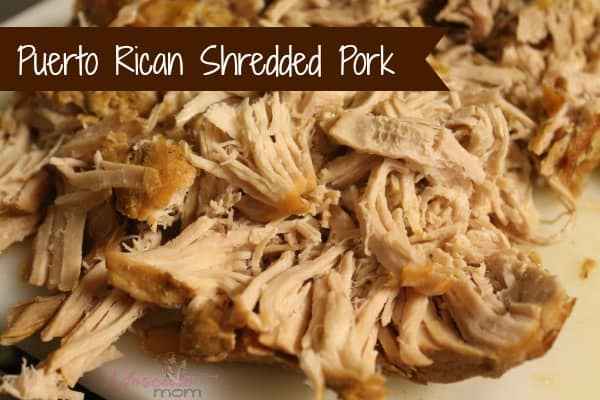
This Puerto Rican Shredded Pork Recipe is full of flavor! Simple ingredients make this healthy slow cooker meal a crowd favorite!

Normally when you think of CrockPot Recipes you do not think of healthy, Eat Clean meals.  Most CrockPot recipes call for some variation of cream-of-something soup or premixed dressing seasoning packets.  

So I was excited to find a recipe that I could tweak in this month's Family Circle Magazine - Puerto Rican Shredded Pork!

CrockPot Puerto Rican Shredded Pork

CrockPot Puerto Rican Shredded Pork

This Puerto Rican Shredded Pork Recipe is both sweet and savory! Super easy to make, this is a crowd favorite for any occasion!

Prep Time 10 minutes
Cook Time 8 hours
Total Time 8 hours 10 minutes

Ingredients

  • 2-3 pound boneless pork roast, , trimmed
  • 1 tablespoon olive oil
  • 1 teaspoon garlic powder
  • 1 tablespoon cumin
  • ½ teaspoon salt
  • 1 tablespoon dried oregano
  • 2 large oranges juiced
  • 3 limes juiced

Instructions

  1. Warm olive oil in a large skillet over medium high heat.
  2. Coat pork roast with garlic powder and brown in skillet on each side.
  3. Combine remaining ingredients in a bowl and mix well.
  4. Place browned pork roast into CrockPot and pour liquid mixture over roast.
  5. Cook on low for 8 hours or on high for 5 hours.
  6. Remove pork and shred with fork on cutting board.
  7. Add shredded pork back in to CrockPot to let cook another 15-20 minutes.
  8. Serve in lettuce wraps topped with pico de gallo.

Nutrition Information:

Yield:

6

Serving Size:

1

Amount Per Serving: Calories: 730Total Fat: 51gSaturated Fat: 18gTrans Fat: 0gUnsaturated Fat: 28gCholesterol: 204mgSodium: 352mgCarbohydrates: 13gFiber: 3gSugar: 6gProtein: 54g

Did you make this recipe?

I would love to see! Tag me on Instagram @lynsey.kmetz or use the buttons below to share it on Pinterest! Thanks for your support!

© Moscato Mom
Cuisine: American / Category: Crock Pot Recipes

Simple Spaghetti Recipe

By 3 Comments

Growing up my favorite meal was my Dad's spaghetti.  I remember being a little girl, standing on a stool, helping Dad stir a great big pot of spaghetti with a great big wooden spoon. Dad always made enough for a small Army, even though it was just the two of us, but we would eat on it for days, getting better every time. I have finally perfected Dad's spaghetti recipe and love to invite him over for dinner to serve our favorite meal.

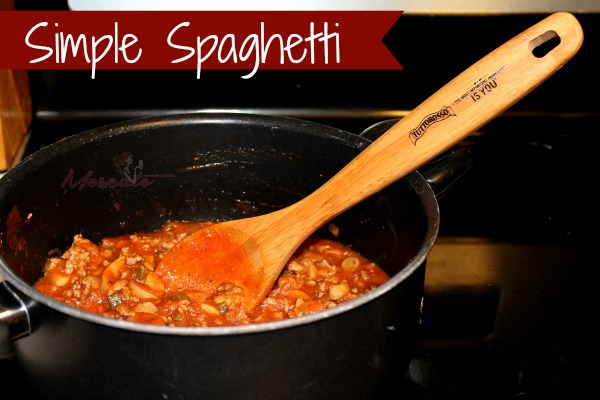
simple spaghetti recipe

Dad's Simple Spaghetti Recipe

Ingredients:

  • 1 pound ground chuck
  • 1 medium onion
  • 1 large green bell pepper
  • 1 can fire roasted tomatoes
  • 1 can tomato paste (I like Tuttorosso)
  • 1 carton fresh sliced mushrooms
  • 2 tablespoon olive oil
  • 1 teaspoon garlic salt
  • 2 teaspoons oregano
  • pasta of choice cooked

Dice up onion and bell pepper and saute in olive oil. Add in ground chuck and cook until meat is completely done and there is no pink.  Drain.  Add in seasonings, tomatoes, tomato paste, and 3 tomato paste cans of water (Dad wasnt a big fan of measuring cups). Mix together and let simmer 20 minutes to let all of the flavors mix together.  Add in fresh mushrooms and cook until mushrooms are desired softness.  Serve with your favorite pasta, salad, and bread.

tuttorosso

Tuttorosso Tomatoes helps make Dad's spaghetti perfect.  Since 1929 the family owned tomato business has been making recipes perfect in homes everywhere. Tuttorosso is owned by Red Gold, a fourth generation family of tomato experts with a family tradition of “producing the freshest, best tasting, tomato products in the world!” Their philosophy that The Most Important Ingredient is You helps promote their desire to bring families back to the dinner table to enjoy a wonderful meal, and time together - just like Dad and I.

You can pick up Tuttorosso products in your local grocery store, and check out their website for tons of great recipes.  You can also join Club Tuttorosso to receive special offers, as well as connect with other club members to exchange recipes.

What is your favorite recipe you remember helping to make as a kid?

lynseysig

Yummy Mummy Halloween Hotdogs

By 14 Comments

pillsbury halloween

These Yummy Mummy Halloween Hotdogs are the perfect fun meal for your little ghouls! Three ingredients make them scary easy!

This week while checking out at the grocery store, Midge spotted the new Easy Halloween Classic Cookbook from Pillsbury.  

Now, normally I do not buy these because well... there is Pinterest.  But this one was so cute and so full of ideas, I couldn't resist and happily slid it down the grocery line.

I am also not a fan of Halloween... there I said it. But I am a huge fan of food. So I thought... maybe I can learn to low Halloween by bringing the two together... it's worth a shot, right!?

Our first meal we made from this cookbook was the Halloween Chicken Pot Pie which I changed the recipe just a bit to make healthier.  

It was a huge hit with the family and luckily it was enough to make two pies - so we even have some leftover for lunch today.

My next must have was the cute little Halloween hotdog mummys right on the cover.  Midge and The Teen come home every day "starving to death" and want something quick and easy to eat right away - but not something so big that it ruins their appetite for dinner.  

The Yummy Mummy Halloween Hotdogs were perfect... and of course I changed up the recipe just a bit.

Speaking of Halloween, I found these Fun Halloween Games that are perfect for kids of all ages. I am not saying I am going to turn into the huge Halloween fan that my daughter hopes I do (I am too chicken!) but between these cute Mummy Hot Dogs and the games... I am hating Halloween a little bit less this year.

crescent mummy dogs

Yummy Mummy Halloween Hotdogs

Ingredients:

  • Hotdogs of choice, uncooked
  • Pillsbury Original Crescent Rolls
  • Dipping sauce of choice

Roll out Pillsbury Original Cresent rolls onto a cutting board, mashing together precut edges to form one large flat dough.  Using a sharp knife, cut into ½ inch long strips.  

Gently wrap strips of dough around hotdog - careful not to break dough.  I used one strip per hotdog, but you can use more to get an even more "wrapped" look.  

Bake at 350* for 15-20 minutes or until cooked through and dough is beginning to brown.  Decorate with mustard eyes and cookie cutter sliced cheese.
These of course taste awesome - anything made with crescent rolls does - but I love how easy it is to grab one on the go.  Even Mike and I enjoyed a mid afternoon snack.

Halloween Hot Dogs - Yummy Mummy

Halloween Hot Dogs - Yummy Mummy

These Yummy Mummy Halloween Hotdogs are the perfect fun meal for your little ghouls! Three ingredients make them scary easy!

Prep Time 5 minutes
Cook Time 15 minutes
Total Time 20 minutes

Ingredients

  • 8 Hotdogs of choice, uncooked
  • Pillsbury Original Crescent Rolls
  • Dipping sauce of choice

Instructions

    Roll out Pillsbury Original Cresent rolls onto a cutting board, mashing together precut edges to form one large flat dough.  

    Using a sharp knife, cut into ½ inch long strips.  

    Gently wrap strips of dough around hotdog – careful not to break dough.  I used one strip per hotdog, but you can use more to get an even more “wrapped” look.  

    Bake at 350* for 15-20 minutes or until cooked through and dough is beginning to brown.  

    Decorate with mustard eyes and cookie cutter sliced cheese.
Nutrition Information:

Yield:

8

Serving Size:

1

Amount Per Serving: Calories: 175Total Fat: 15gSaturated Fat: 6gTrans Fat: 0gUnsaturated Fat: 7gCholesterol: 30mgSodium: 496mgCarbohydrates: 4gNet Carbohydrates: 0gFiber: 0gSugar: 2gSugar Alcohols: 0gProtein: 6g

Did you make this recipe?

I would love to see! Tag me on Instagram @lynsey.kmetz or use the buttons below to share it on Pinterest! Thanks for your support!

© Moscato Mom
Cuisine: American / Category: Main Dishes

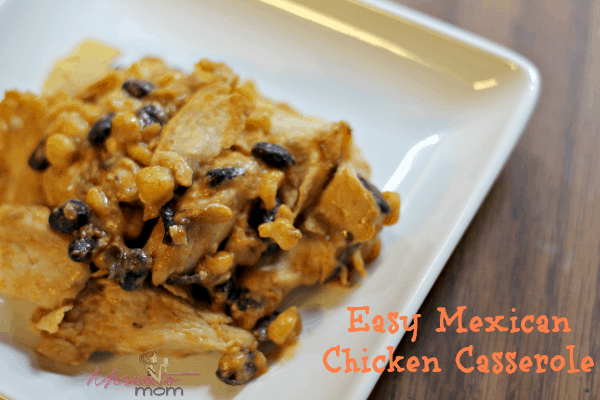
Easy Mexican Chicken Casserole Recipe

By 8 Comments

Last month I shared with you my Italian Chicken Casserole  - a recipe I concocted as part of the #CountryCrockCasserole Club that turned out amazing.  We have since eaten it twice - every time wishing I had made a double portion for more left overs.  This month I was challenged again to make another Country Crock Casserole using a few items in my Casserole Kit  plus "items you have on hand." The Casserole Kit included a recipe for Mexican Beef and Corn Casserole but there was a problem... I only had chicken.  SO - I got creative again - throwing random stuff in from my pantry - and ended up with another amazing casserole!  Even though it isnt the PRETTIEST casserole I have ever made, it sure is one of the tastiest.
easy mexican chicken casserole
[Read more...]

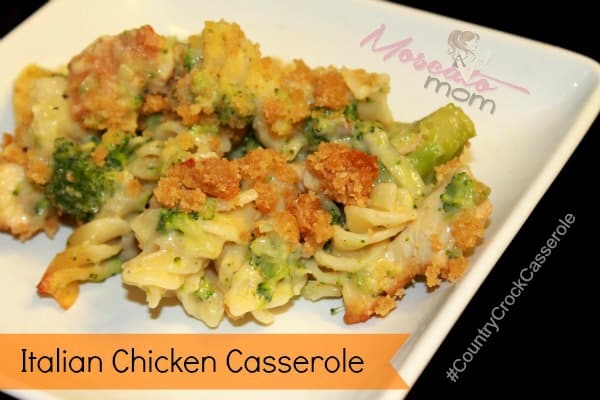
Italian Chicken Casserole

By 4 Comments

Last month I was invited to participate in the Country Crock Casserole Club where I get to make delicious casseroles and offer great giveaways from Country Crock.  I happily accepted this opportunity, since anyone that knows me knows Country Crock is a staple in my house, and Mike and I joke about having the "full set" of Country Crock "tupperware" bowls.

country crock casseroles
[Read more...]

Perfect Portion Pizzas

By 8 Comments

You may remember last week when I posted about my "Perfect Portion Pizzas".... that disappeared.  Thankfully they were delicious enough that no one complained about me making them again so soon.

[Read more...]

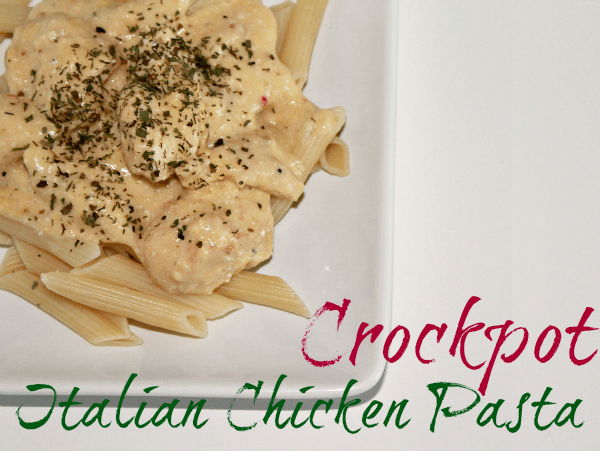
Crockpot Italian Chicken Pasta

By 9 Comments

I love cooking in my Crockpot.  Especially during the cooler months, it makes life so much easier to throw a couple ingredients into the Crockpot and let it roll.  The best part about Crockpot Cooking - the best ingredients are usually stuff you have on hand.

This week has been particularly trying, so when I was staring into the refrigerator this morning - with zero desire to be creative - I saw that I had thawed chicken breasts and cream cheese.  In the pantry - pasta, cream of chicken, and an Italian dressing seasoning packet.

Six hours later - dinner was served.

[Read more...]

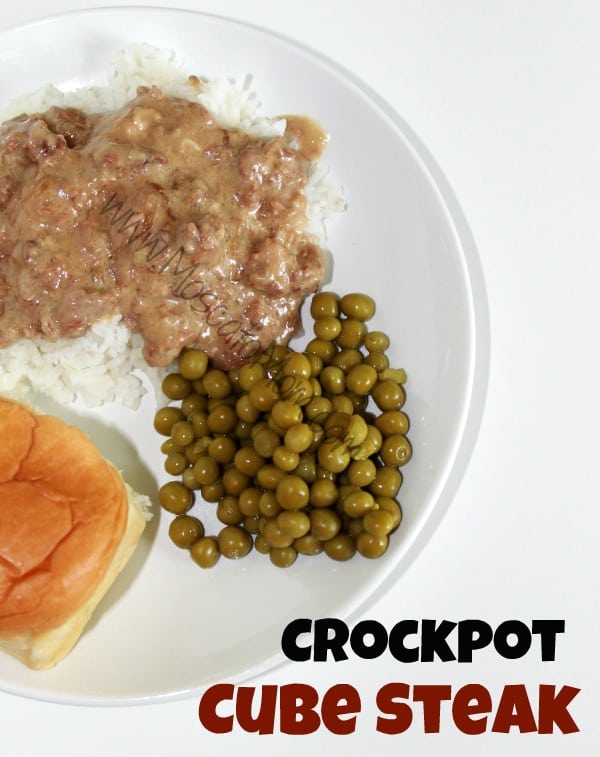
How To Cook Cube Steak - Crockpot Style

By 2 Comments

I had never purchased "cube steak" before in my life until this week.  In fact, I never even had the desire to - with my weird aversion to meat nothing even sounded remotely appetizing about "cube steak." 

Plus everything I had heard compared the cut of meat to a shoe sole, so I just overlooked it at the store.

Wow was I ever wrong.

Crockpot Cube Steak

(aka My Family's New Favorite Meal)

Ingredients:

  • 1 package of cube steak
  • 2 cans Cream of Mushroom Soup
  • 1 package Lipton Onion Soup Mix
  • ½ cup milk

The directions could not be more simple - throw everything into the Crockpot and cook on low for 5 to 6 hours - depending on how much steak you used. 

We put ours over white rice and it was absolutely some of the best stuff any of us have ever tasted. 

It was a bit salty - so next time I will probably get "Low Sodium" cream of mushroom, but honestly, I have been wanting more ever since we scraped the last drop out of the Crockpot.

The great thing too is that cube steak is cheap - so even the large family size package I got on sale for less than $8.  I think the entire meal ran us about $20 to feed our family of four. 

This is an easy meal you can start in the morning, go to work, and will be ready when you walk in the door. 

In fact, I recommend that - because sitting here at home while it was cooking all day was excruciating - it smelled so good!

Now, it may not LOOK like the prettiest thing you have pulled out of a Crockpot - but it certainly does top the list taste-wise.  

Mike and the girls gobbled up every bite, asking for more.  I had hoped to have leftovers for lunch the next day, but I wasn't so lucky. 

I will be cooking a double batch next time.

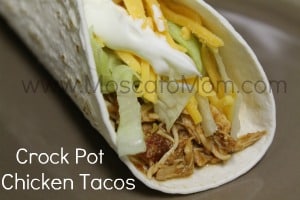
Crock Pot Chicken Tacos

By 10 Comments

I have a mild obsession with Mexican food.

Like... I may or may not have just eaten a Taco Cupcake.... for breakfast.

Anyway, my favorite meal is chicken tacos.  I can seriously eat them any time day or night.  Nothing tops lean chicken, lettuce, cheese and sour cream all smushed together.   It's heaven in a tortilla.

The bad news:  My family isnt quite as obsessed.

Which leaves me wanting chicken tacos and having to suffer through... well anything else.

Until now.

Crock Pot Chicken Tacos

First of all, this is so stinkin easy, I can not believe I am 32 years old and this is the first time I have cooked this.

Wait, yes I can.  Have you seen me try to boil eggs?

Sorry, where was I?

Ingredients

  • boneless, skinless chicken breasts
  • taco seasoning
  • 1 jar mild salsa
  • 1 cup chicken broth
  • taco shells and toppings of choice

Ready for these instructions... throw everything into the Crockpot.  Mix well.  Cover and let sit to do its thing for 6 hours on medium.  When it is done the meat will be so tender it will just fall apart into shredded chicken goodness.

The HARDEST part of this whole recipe  - if you work from home like I do - smelling it cook all day without being able to eat it!

I KNOW. 

Rio Bravo is going to miss me....

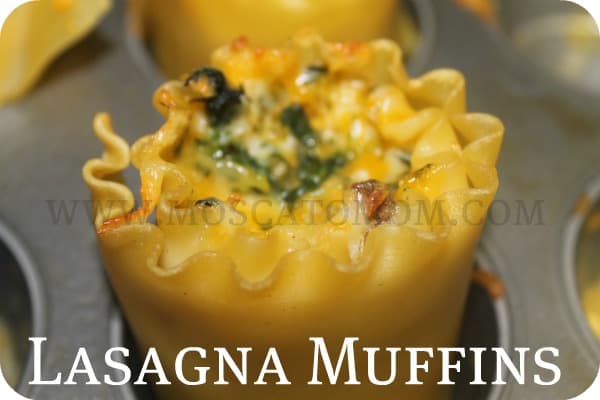
Portion Control Lasagna - Lasagna Muffins

By 15 Comments

I couple months ago I saw "Lasagna Cups" on Pinterest and fell in love.  Lauren from Lauren's Latest had some pictures that would make your mouth water so I knew I had to try it.   After all I love making all kinds of things in muffin tins - especially my Breakfast Casserole Muffins!

Lauren shared a great traditional lasagna recipe that she used for her lasagna muffins, but I decided to make my Almost Famous Turkey and Spinach Lasagna instead.   They were AMAZING.

Almost Famous Turkey and Spinach Lasagna Muffins

  • 1 pound ground turkey
  • 1 can Campbell's Cheddar Cheese Soup
  • 1 teaspoon Garlic Salt
  • 1 cup milk
  • 2 cups shredded sharp cheddar
  • 2 cups shredded mozzarella cheese
  • 1 pkg chopped spinach
  • 1 egg
  • lasagna noodles

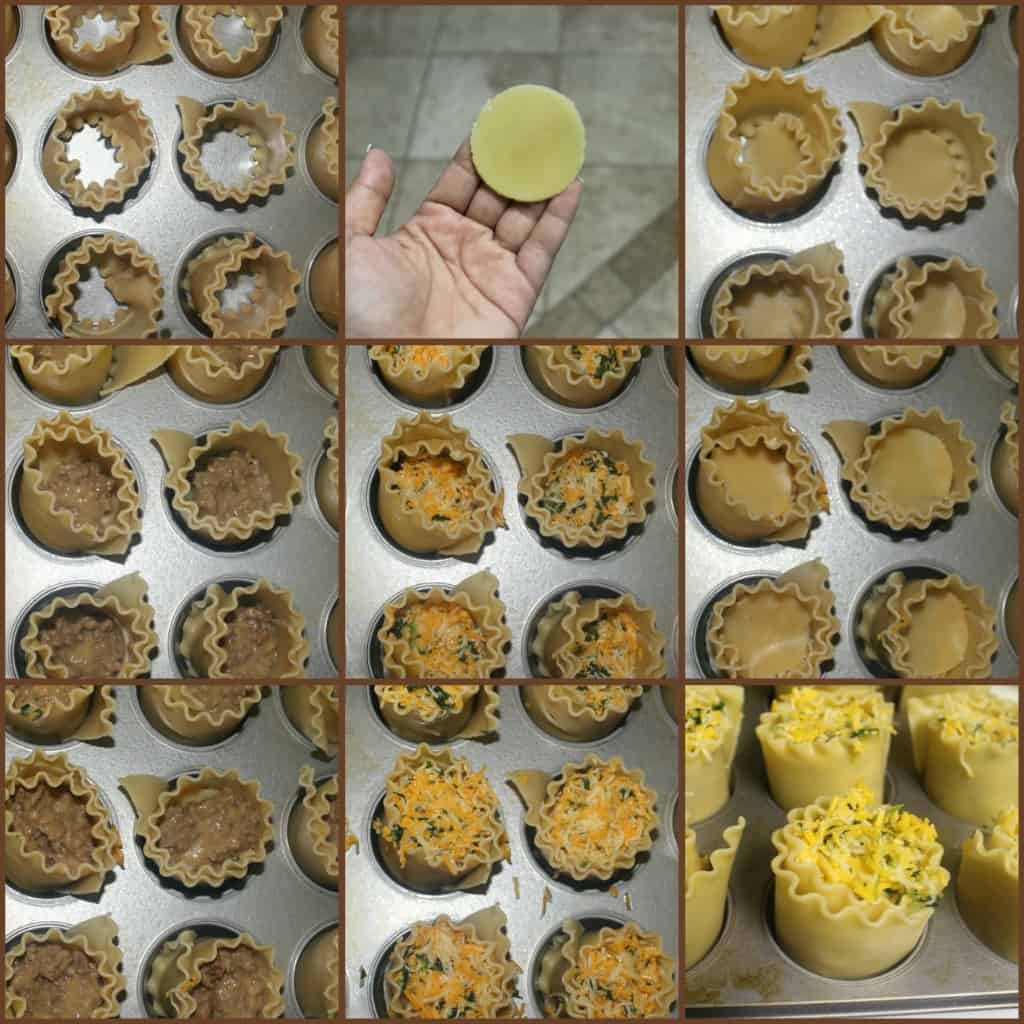
Cook lasagna noodles "al dente" and lay out on wax or parchment paper to cool.  Spray a muffin tin with cooking spray and gently roll your noodles around your hand and place into muffin tin.  With remaining noodles use a child's cup or cookie cutter to cut circles out of the noodles to be the "layers."   Set aside.

Cook turkey completely and drain. Mix in soup, garlic salt, and milk until well blended. Set aside.

Thaw spinach under warm water and squeeze ALL excess water. Mix cheeses and egg. Pull spinach apart in pieces and mix into cheeses.  (Its best if you just take your rings off and go at it with your hands)

Beginning with a noodle circle, layer the circles, meat, and cheese mixture until "muffin" is full - making sure to end with the cheese so it will melt and be all bubbly at the top.

Cook at 350* for 20-30 minutes or until bubbly.   Muffins will easily pop out onto a plate.  Serve hot with your favorite salad and garlic bread.

These were such a huge hit for dinner - the girls loved them!  They were fun to eat and pull apart, and it was the perfect serving size.    They save perfectly - you can just pop them in a tupperware container and reheat them one by one.

Thanks to Lauren for the awesome blog post and thanks to Pinterest for helping me find her!   I know we will make these again and again!

Cowboy Casserole Recipe - A Pinterest Success

By 24 Comments

When I discovered Pinterest a few months ago, the very first board I made was "Food I Might Someday Attempt to Make" and I frantically began pinning the yummiest, most amazing looking dishes I could find.  From entrees to cake pops to cocktails - I pinned them all!!

And that is where they stayed...That is, until this week.

I am happy to say I am 3 for 3 on the Pinterest recipes - that each one of them has been just as mind-blowingly amazing as I expected them to be.   I am going to share all three - and give all of the credit to the sites where I found the recipes - as they are absolutely going to be made again and again here in the Moscato Household.

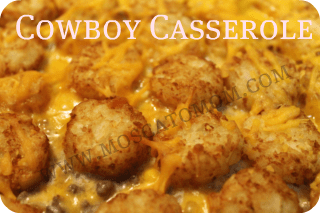
My first success - Cowboy Casserole - comes from The Cutting Edge of Ordinary, and she says she adapted it from a Taste of Home Recipe.   Well... she adapted it perfectly because this absolutely is one of the best casseroles I have ever tasted.  I did have to change a few things - like I used minced garlic instead of cloves - but it was still beyond fantastic.

This is an absolute "must try" recipe - truly.  I wasn't sure about this one, it was actually the last of the three that I decided to try, but it was absolutely fantastic and my family practically licked their plates clean.

Thanks so much to Lisa from The Cutting Edge of Ordinary for this amazing recipe (and Pinterest for helping me to find it!)  You can check out Lisa's blog and see all kinds of other yummy looking dishes - that I am sure I will be trying very very soon.

Yield: 16

Cowboy Casserole Recipe – A Pinterest Success

Cowboy Casserole Recipe – A Pinterest Success

Cowboy Casserole is the ultimate comfort food. Warm and filling this is a family favorite.

Prep Time 10 minutes
Cook Time 30 minutes
Additional Time 15 minutes
Total Time 55 minutes

Ingredients

  • 1 ½ pounds ground chuck
  • 1 medium onion, , finely chopped
  • 1 tablespoon minced garlic
  • 1 can, (15.25oz) whole kernel corn, drained
  • 1 can Campbell’s cream of mushroom soup
  • 2 cups shredded cheddar cheese
  • ½ cup milk
  • 4 tablespoons Daisy sour cream
  • 1 bag Ore-Ida Crispy Crowns tater tots

Instructions

  1. Chop your onion and sautee in a few drops of Olive Oil until soft. Add minced garlic and cook on low for another minute or two. Add in ground chuck and cook until completely done and no pink is left. Drain and set aside.
  2. In a separate bowl mix together soup, milk, and sour cream and mix together well. Pour meat mixture in and mix well. Add in 1 cup shredded cheese and corn and gently mix together.
  3. In a 9×13 dish link a row of Ore-Ida Crispy Crowns. Pour entire mixture into dish and spread evenly across tots. Top with another layer of tots and sprinkle the remaining cup of cheese.
  4. Bake uncovered at 350* for about 30 minutes or until Crispy Crowns are crispy and casserole is bubbly. Let stand 10-15 minutes before serving.

Nutrition Information:

Yield:

16

Serving Size:

1

Amount Per Serving: Calories: 407Total Fat: 27gSaturated Fat: 12gTrans Fat: 1gUnsaturated Fat: 11gCholesterol: 109mgSodium: 325mgCarbohydrates: 9gFiber: 1gSugar: 2gProtein: 31g

Did you make this recipe?

I would love to see! Tag me on Instagram @lynsey.kmetz or use the buttons below to share it on Pinterest! Thanks for your support!

© Moscato Mom
Cuisine: American / Category: Main Dishes

Pizza Lasagna Recipe

By 4 Comments

Back in April I shared with you my Almost Famous Turkey and Spinach Lasagna Recipe which continues to be a favorite around here.  Except for Mike.   He isnt exactly "lactose intolerant" but that much cheese isnt good for him.  Normally I make just another "regular" lasagna, but this time I wanted to change it up and make something I knew he would like - PIZZA.

I looked online for a few recipes, but really didnt see anything that just sounded fantastic.  Part of this whole "learning to cook after 30" has been simply throwing things together anyway, so I basically took all if his favorite pizza toppings, and added noodles.

He LOVED it.

Pizza Lasagna

Ingredients:

  • 1 box lasagna noodles
  • 2 jars of pizza sauce
  • 16 ounces mozzarella cheese
  • 1 container ricotta cheese
  • 1 pound ground beef
  • your favorite pizza toppings:  pepperoni, onion, bell pepper, black olives, etc
  • Oregano
  • Garlic

Brown meat almost completely and drain.  Add in "crunchy" toppings - bell peppers, onions, etc and let cook a few more minutes until toppings start to get soft.  Drain.   Mix in pizza sauce and stir well.  Add oregano and garlic to taste.

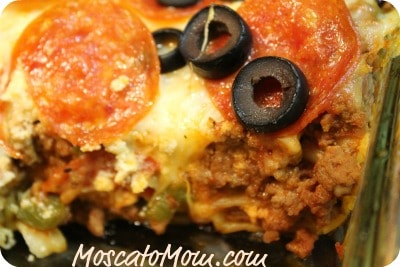
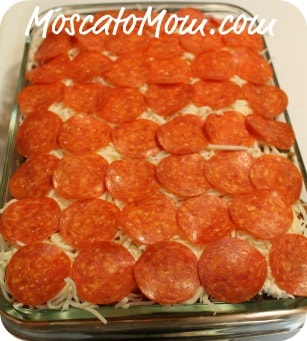
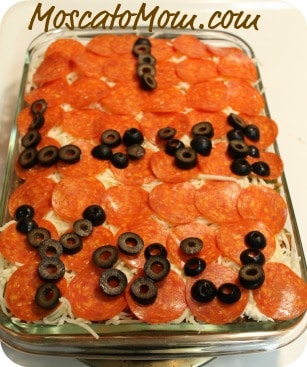
Put a small layer of pizza sauce in the bottom of a 9x13 pan to keep noodles from sticking.  Then layer noodles, meat mixture, ricotta cheese, mozzarella cheese, pepperoni, olives and other desired toppings until dish is full.  (I was able to get two layers of everything into mine)  Top with remaining mozzarella cheese and toppings.  You can even get creative if you want to.

Note: spelling things in olives is a hell of a lot harder than it looks.

Cover with foil and bake at 350* for 30 minutes or until sides are bubbly. Remove foil and cook another 5-10 minutes to brown cheese and toppings.  Let stand about 15 minutes before cutting into.

This lasagna took literally HALF the time as my other one, and Mike and the girls all went back for seconds.  It is absolutely something we will have again and again!

Happy cooking!


  • « Previous Page
  • 1
  • 2
  • 3
  • 4
  • Next Page »


Looking For a Specific Recipe? Find It Here!

Copyright © 2023 Moscato Mom • All Rights Reserved • Site Powered by The One Stop Blog Shop

Wait! Get Your Free Keto Cookbook Before You Go

No more dinner time stress! This cookbook helps you prepare 10 keto freezer meals in only 30-minutes and it's yours today for free.

Your Name
Your Email

No thanks, I’m not interested!