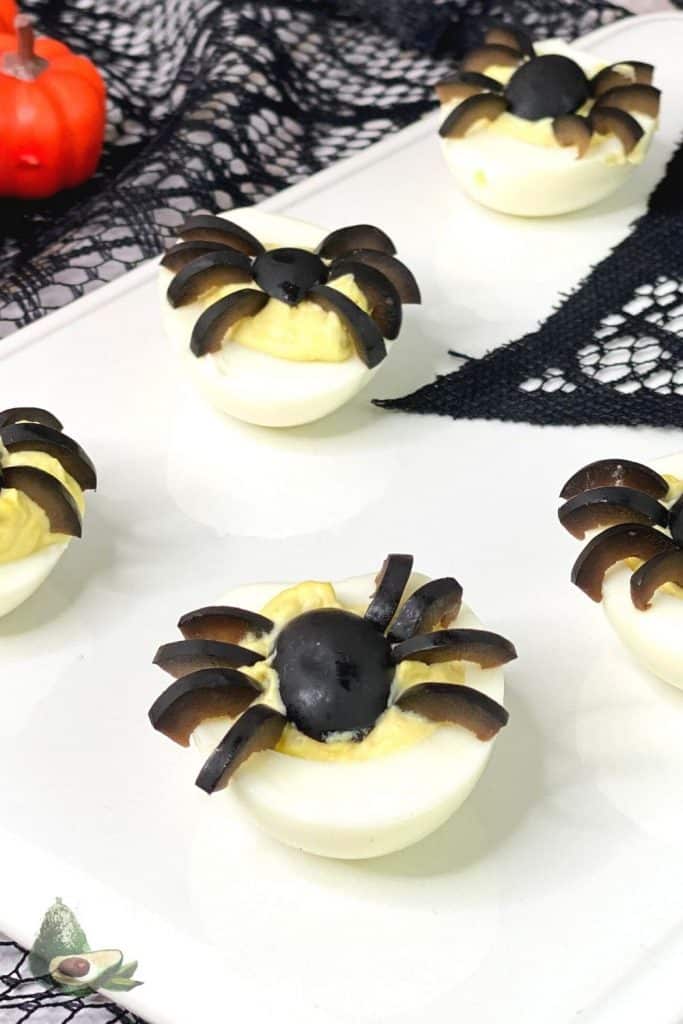
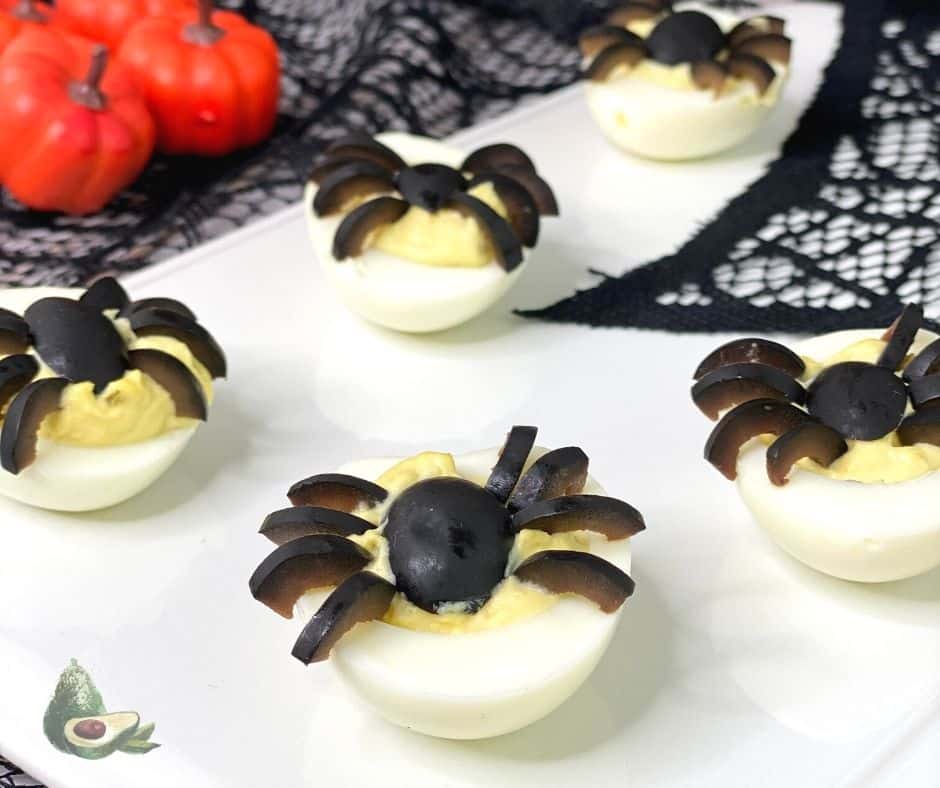
These Spider Deviled Eggs are perfect for your Halloween Party! Deliciously creepy these are a Keto Halloween Snack everyone will love!
Halloween parties are all about the drinks and food - and Spider Deviled Eggs are the perfect finger food that only takes a few ingredients.
As a bonus, these Halloween Deviled Eggs are keto friendly. Each Spider Deviled Egg has just two carbs!
The key to the best deviled eggs is a perfectly boiled egg. This Rapid Egg Cooker makes perfectly boiled eggs every single time. Even the freshest of eggs peel perfectly.
You can boil the eggs ahead of time and prepare them just before your party for best results.
Related Article: Pumpkin Spice Fat Bombs
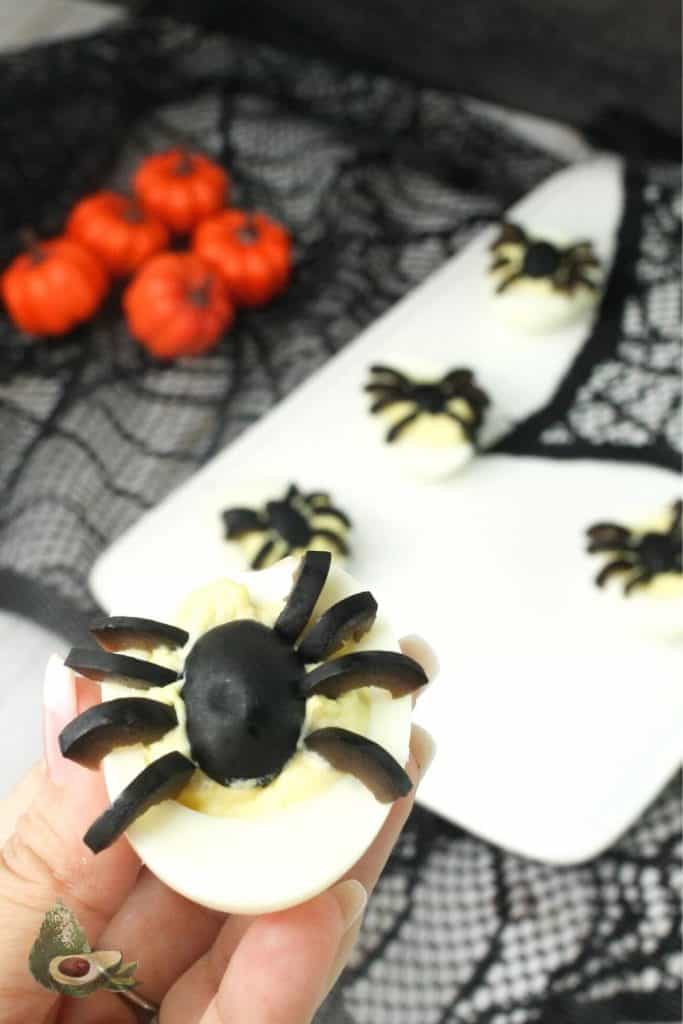
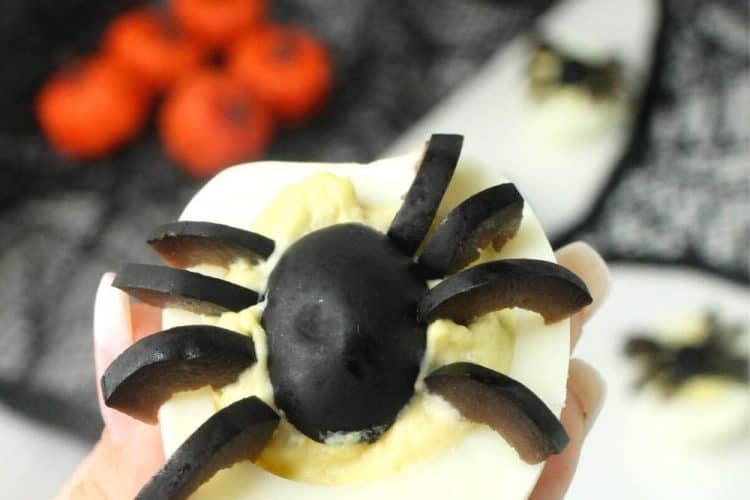
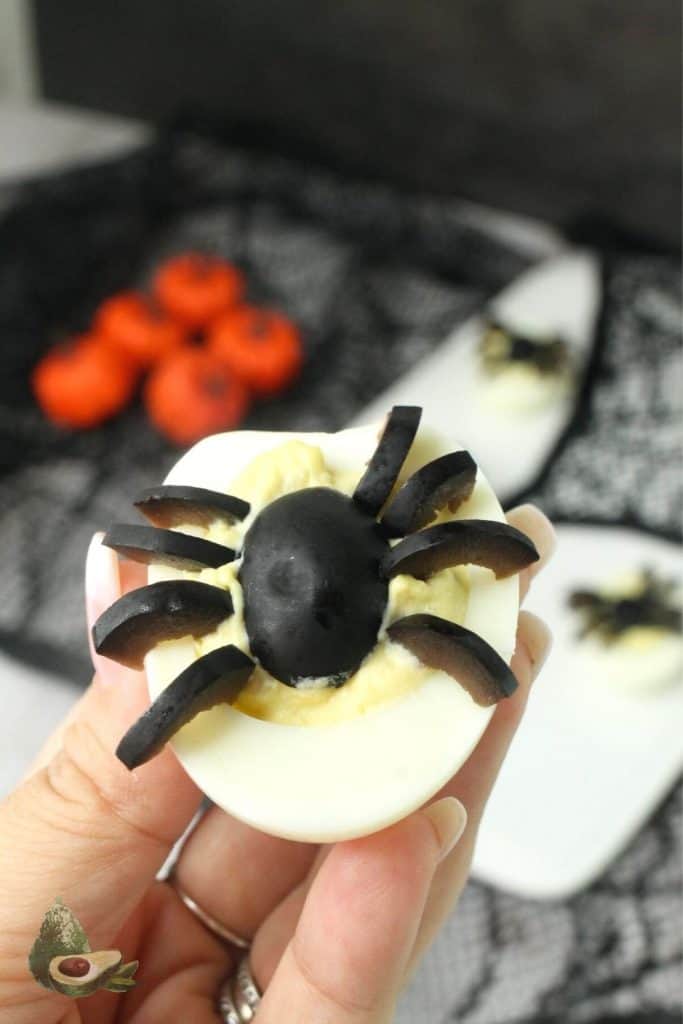
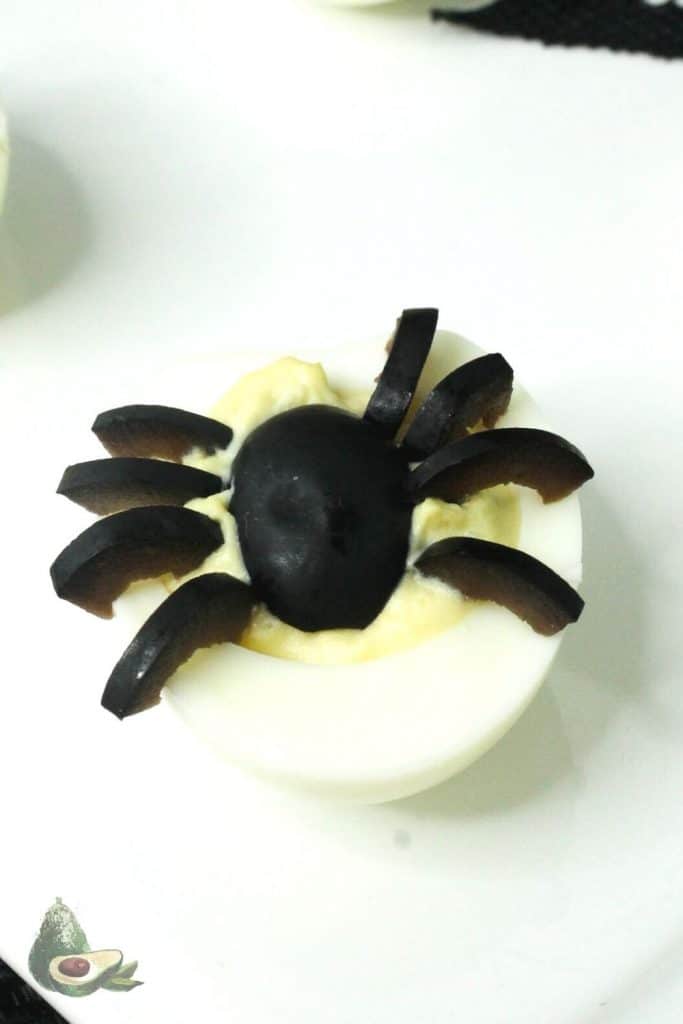
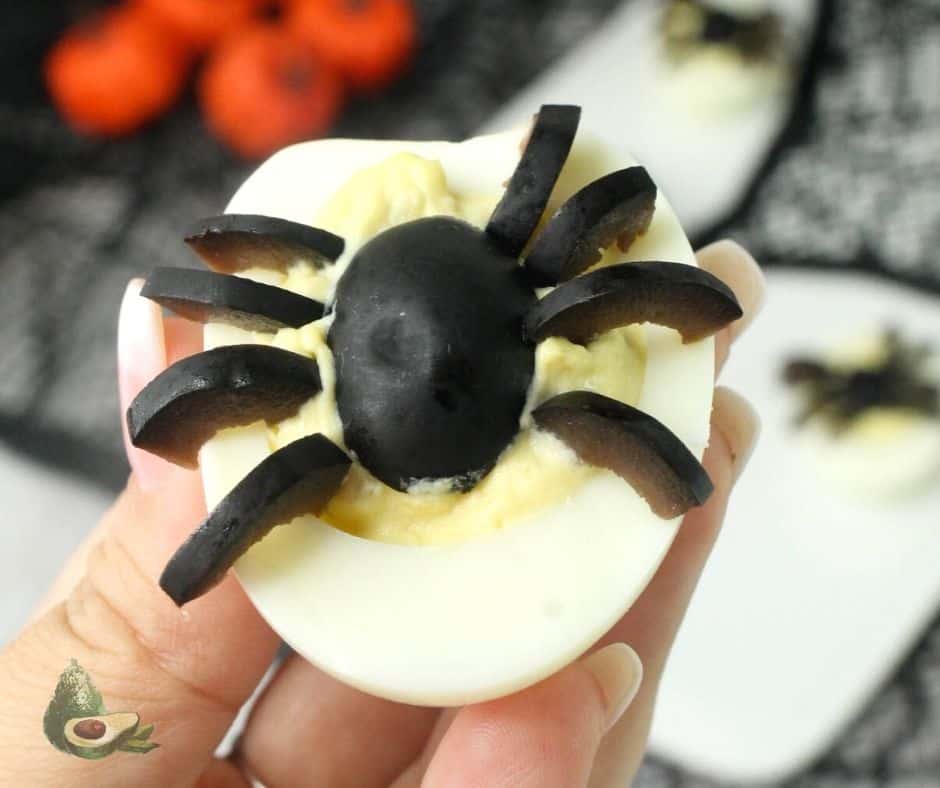
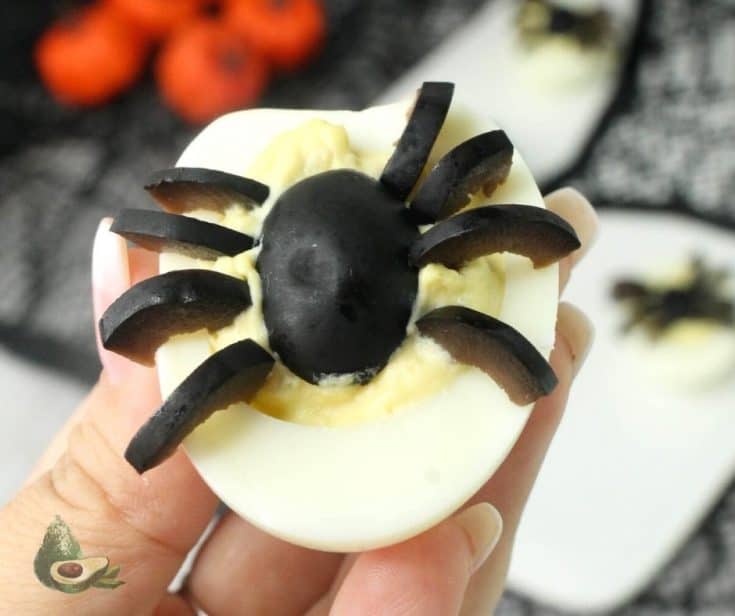
You can use black olives or green olives to make your "spider." You will use one whole olive for each deviled egg.
You want to use firm olives that are easy to slice and will hold their shape. Large pitted black olives work perfectly.
Keto Halloween Spider Deviled Eggs
INGREDIENTS
- 6 eggs
- 3 tablespoon mayonnaise
- 1 tablespoon mustard
- 1 tablespoon sugar free relish
- 12 large black pitted olives
INSTRUCTIONS
Hard boil eggs, peel and let cool completely.
Slice in half lengthwise and put yolks into a separate bowl.
Mask yolks and mix in mayonnaise, mustard, and relish. If mixture is too thick, add additional mayonnaise.
Put mixture into icing bag or ziplock bag and snip the end. Fill each egg half with the mixture and set aside.
With a sharp knife slice black olive lengthwise at ⅔rds. Use the ⅓ for the body of the spider.
Use the ⅔ to make the legs by slicing into strips and then down the center.
Place the body of the spider in the center of the egg and gently place legs around - making sure they are securely in the egg yolk mixture. Enjoy!
Halloween Spider Deviled Eggs
These Spider Deviled Eggs are perfect for your Halloween Party! Deliciously creepy these are a Keto Halloween Snack everyone will love!
Ingredients
- 6 eggs
- 3 tablespoon mayonnaise
- 1 tablespoon mustard
- 1 tablespoon sugar free relish
- 12 large black pitted olives
Instructions
- Hard boil eggs, peel and let cool completely.
- Slice in half lengthwise and put yolks into a separate bowl.
- Mask yolks and mix in mayonnaise, mustard, and relish. If mixture is too thick, add additional mayonnaise.
- Put mixture into icing bag or ziplock bag and snip the end. Fill each egg half with the mixture and set aside.
- With a sharp knife slice black olive lengthwise at ⅔rds. Use the ⅓ for the body of the spider.
- Use the ⅔ to make the legs by slicing into strips and then down the center.
- Place the body of the spider in the center of the egg and gently place legs around - making sure they are securely in the egg yolk mixture. Enjoy!
Nutrition Information:
Yield:
12Serving Size:
1Amount Per Serving: Calories: 71Total Fat: 5gSaturated Fat: 1gTrans Fat: 0gUnsaturated Fat: 4gCholesterol: 94mgSodium: 114mgCarbohydrates: 2gFiber: 0gSugar: 2gProtein: 3g
Nutrition calculations based on exact ingredients used and may vary between brands. For exact macro measurements, always calculate your own macros using the exact ingredients that you use.